Admin
Below is the overview of the Admin screen. You can go there by clicking the person icon at the bottom of the navigation area.

Create New User
Click Create New User button on the top right hand corner of the screen.
You can either load settings from an exisiting user or create a new one.
Fill in fields. There are 3 tabs:
User Data tab
Name: Name of user.Login Name: Username to use when logging in.Email: Email address of user. This is where the dialer will email the exports.Caller ID Name and Number: This is the CID information that will be used on the outbound calls generated by the system. This is what the client will see on their end. It is important to use real phone numbers. Using an invalid CID is not permitted by our service. Do not use 800 numbers.Password: Password to use when loggin in.POST URL: Location of your CMS to upload leads / good contacts. See POST URL Configuration for more information.Support URL: Location where your support script is located.
Privileges tab
Admin User: Allow user to access and perform Administrative actions.Manage Campaigns: Allow user to manage campaigns.Allow Exports: Allow user to export contact lists, call detailed records, and productivity.Auto Next Default: Allow user to automatically dial next contact.Script Pop Default: Script pop-ups automatically when a user made contact.Enable Edit Settings: Allow user to edit his / her settings.Enable Monitor: Allow user to speak, barge in, or coach another user’s call.Show Productivity: Display agent productivity.Kick Idle Agents: Allow dialer to kick agent if idle.
Tabs & Appearance
Show Home Tab: Show Dashboard screenShow List View Tab: Show List View screenEnable Email Sending: Allow email sending to contacts.Show ContactNotes: Allow notes.Show Auto Next Checkbox: Show upon disposition, load next call checkbox.Show Script Pop Checkbox: Show script button.Show Assign To Dispo: Allow user to assign contact to another agent.Show Custom Disposition: Show custom disposition dropdown.Preload Contacts: Preload contacts on a campaign.Record Direct Calls: Show record button.
Edit User
To update user settings, click the yellow pencil icon under the user. See Create User in previous section for fields descriptions.
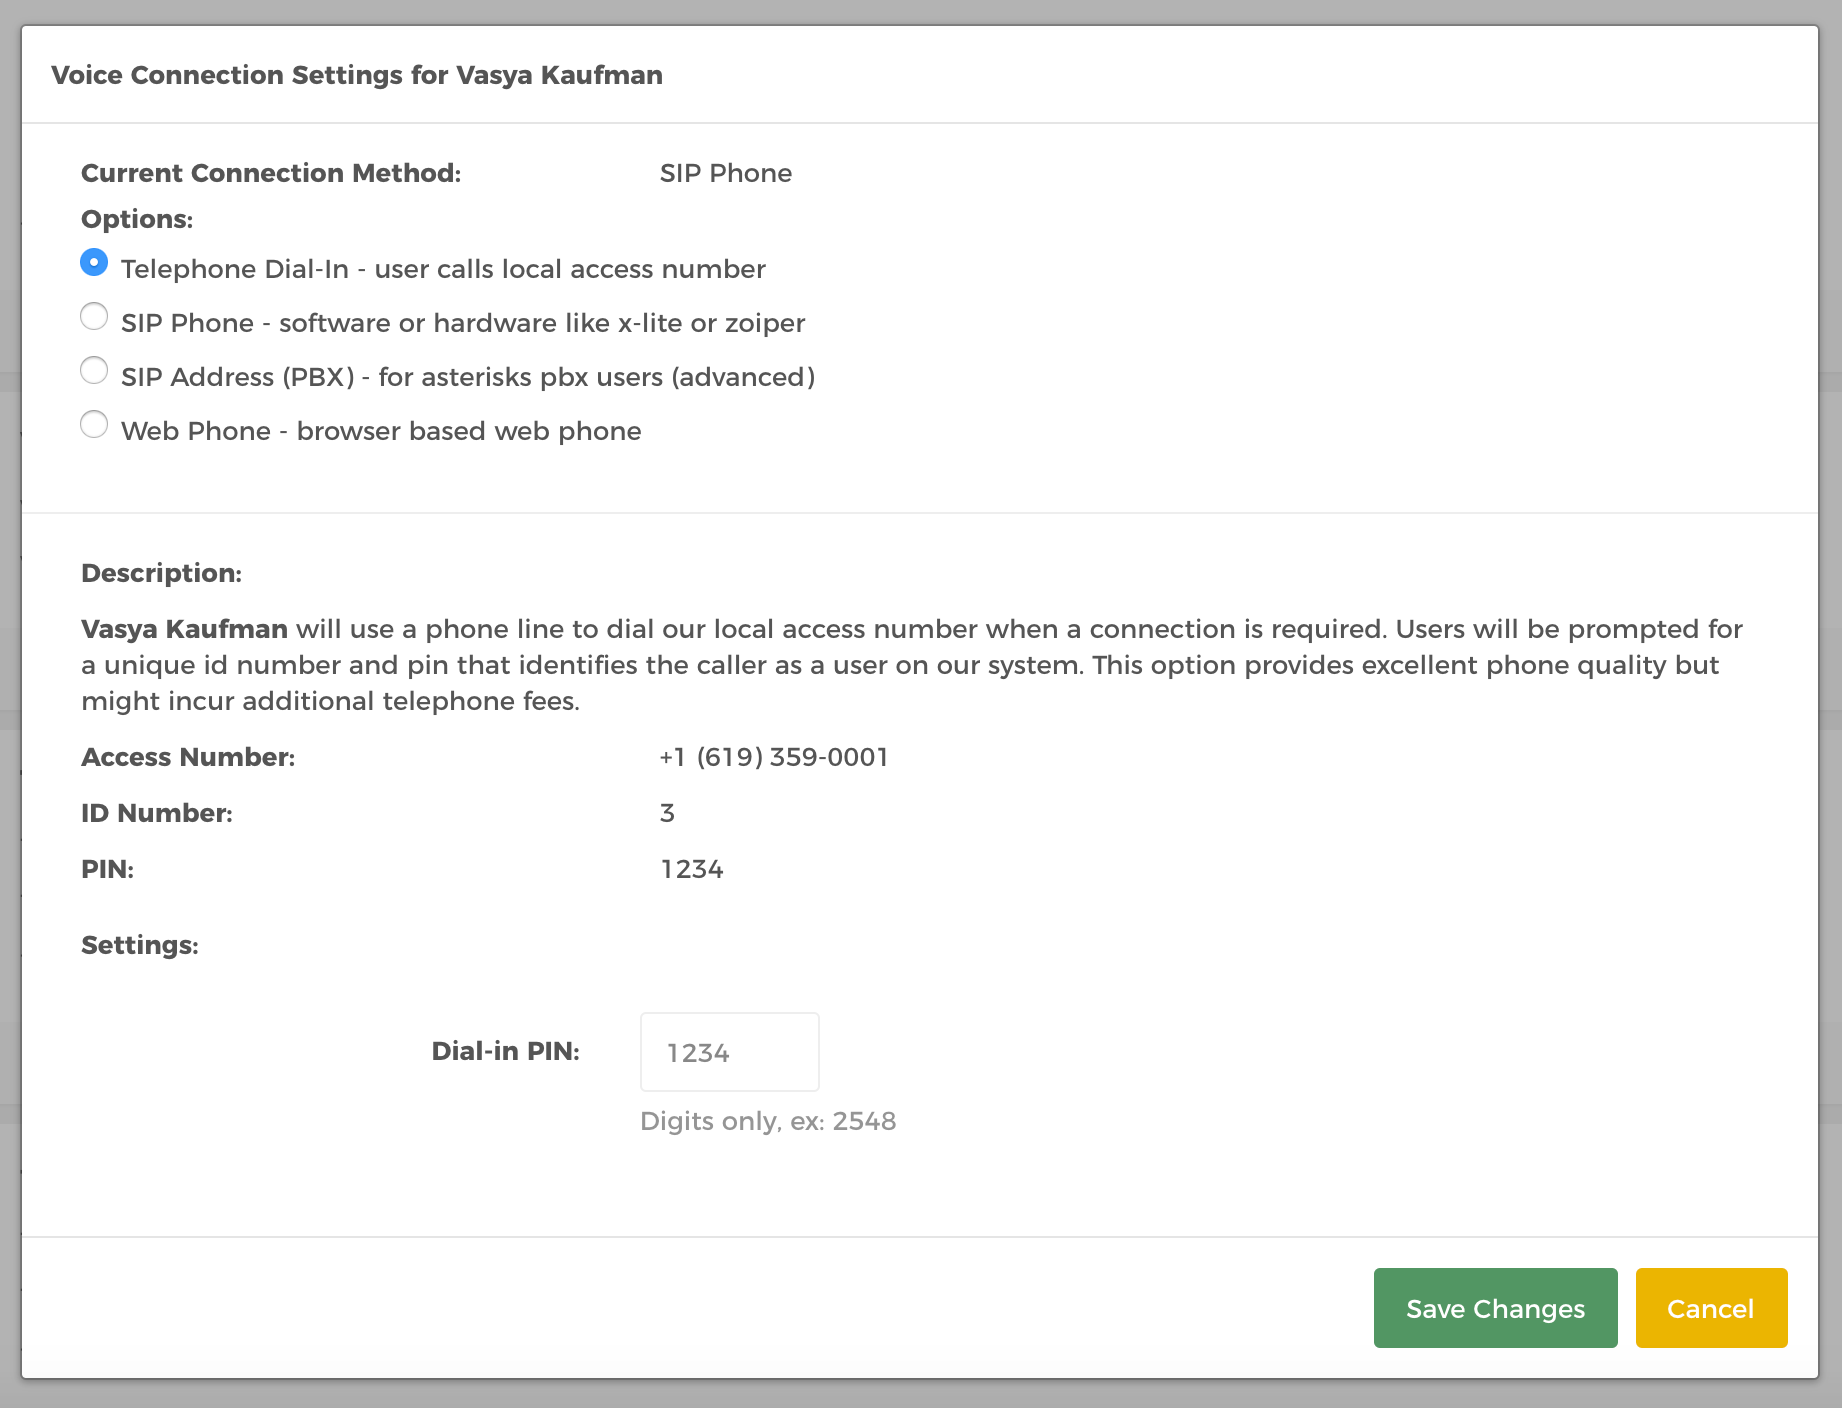
Specify Connection Method
To set connection method for each user, click the Edit Connection wifi icon under a user. We support 4 connection methods Telephone Dial in, SIP phone, SIP PBX and Web Phone.
Telephone Dial-In: User calls local access number.
SIP Phone: Software or hardware like x-lite or zoiper.
SIP Address (PBX): For asterisks pbx users (advanced).
Web Phone: Browser based web phone.
View Connected Calls of a User
To review connected calls of each user, click the telephone icon under a user.

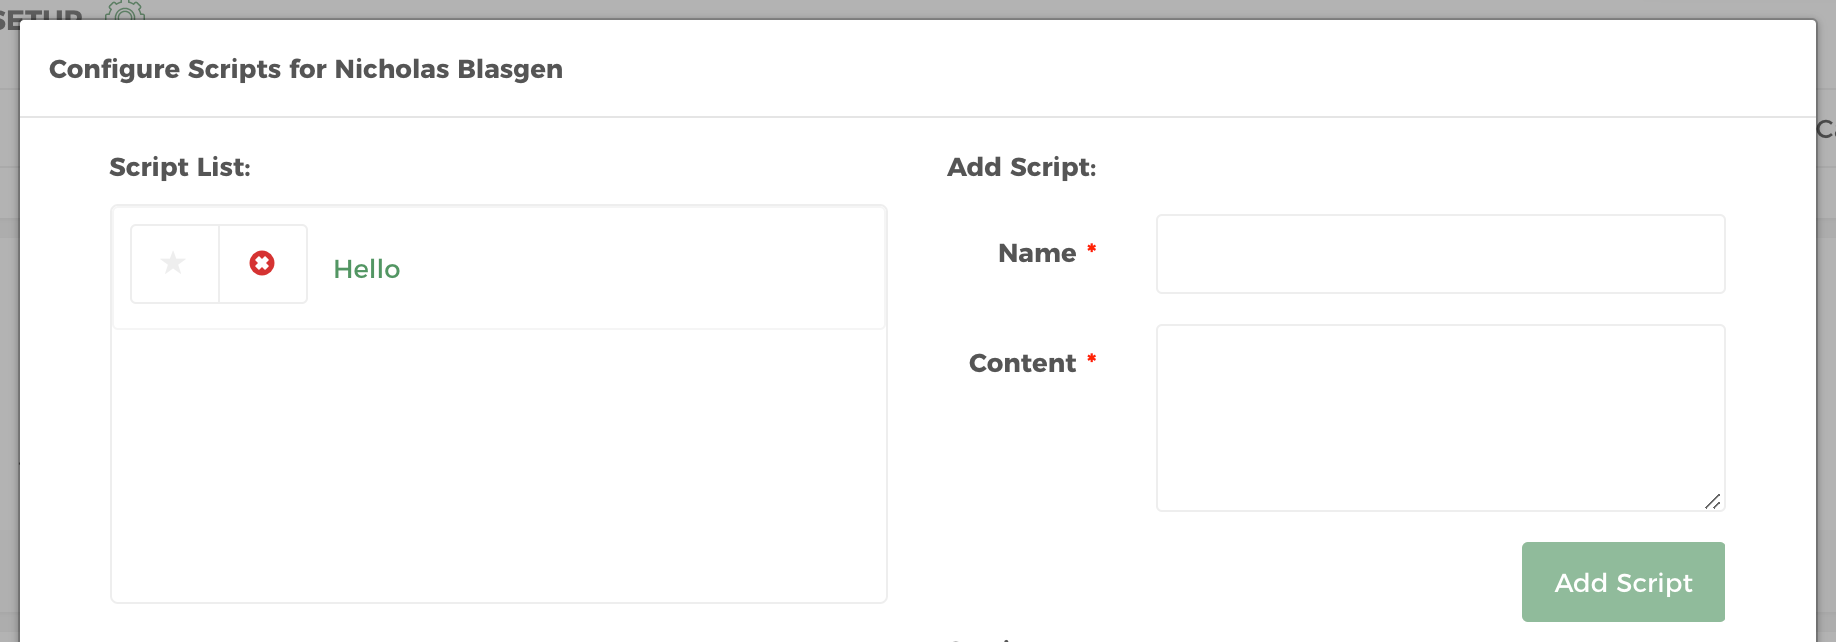
Configure Scripts for a User
Begin by clicking the list icon that says Edit Script Setup when hovered.
The dialer has support for agent calling scripts. The default script can be configured to appear on screen when a contact is found or when the agent manually presses the Script icon under the disposition bar. Press the Star icon in the Script list to the left to set it as default.
Merging scripts with information about the contact is possible by using the #{<Database Field Name>} within the content of the script. For example, if the script should start out as ‘Hello Matt, this is John Smith from HelloHunter...’ and the database field name to replace is Name (case sensitive) ‘Hello #{Name}, this is John Smith from HelloHunter...’ should be placed in the content.
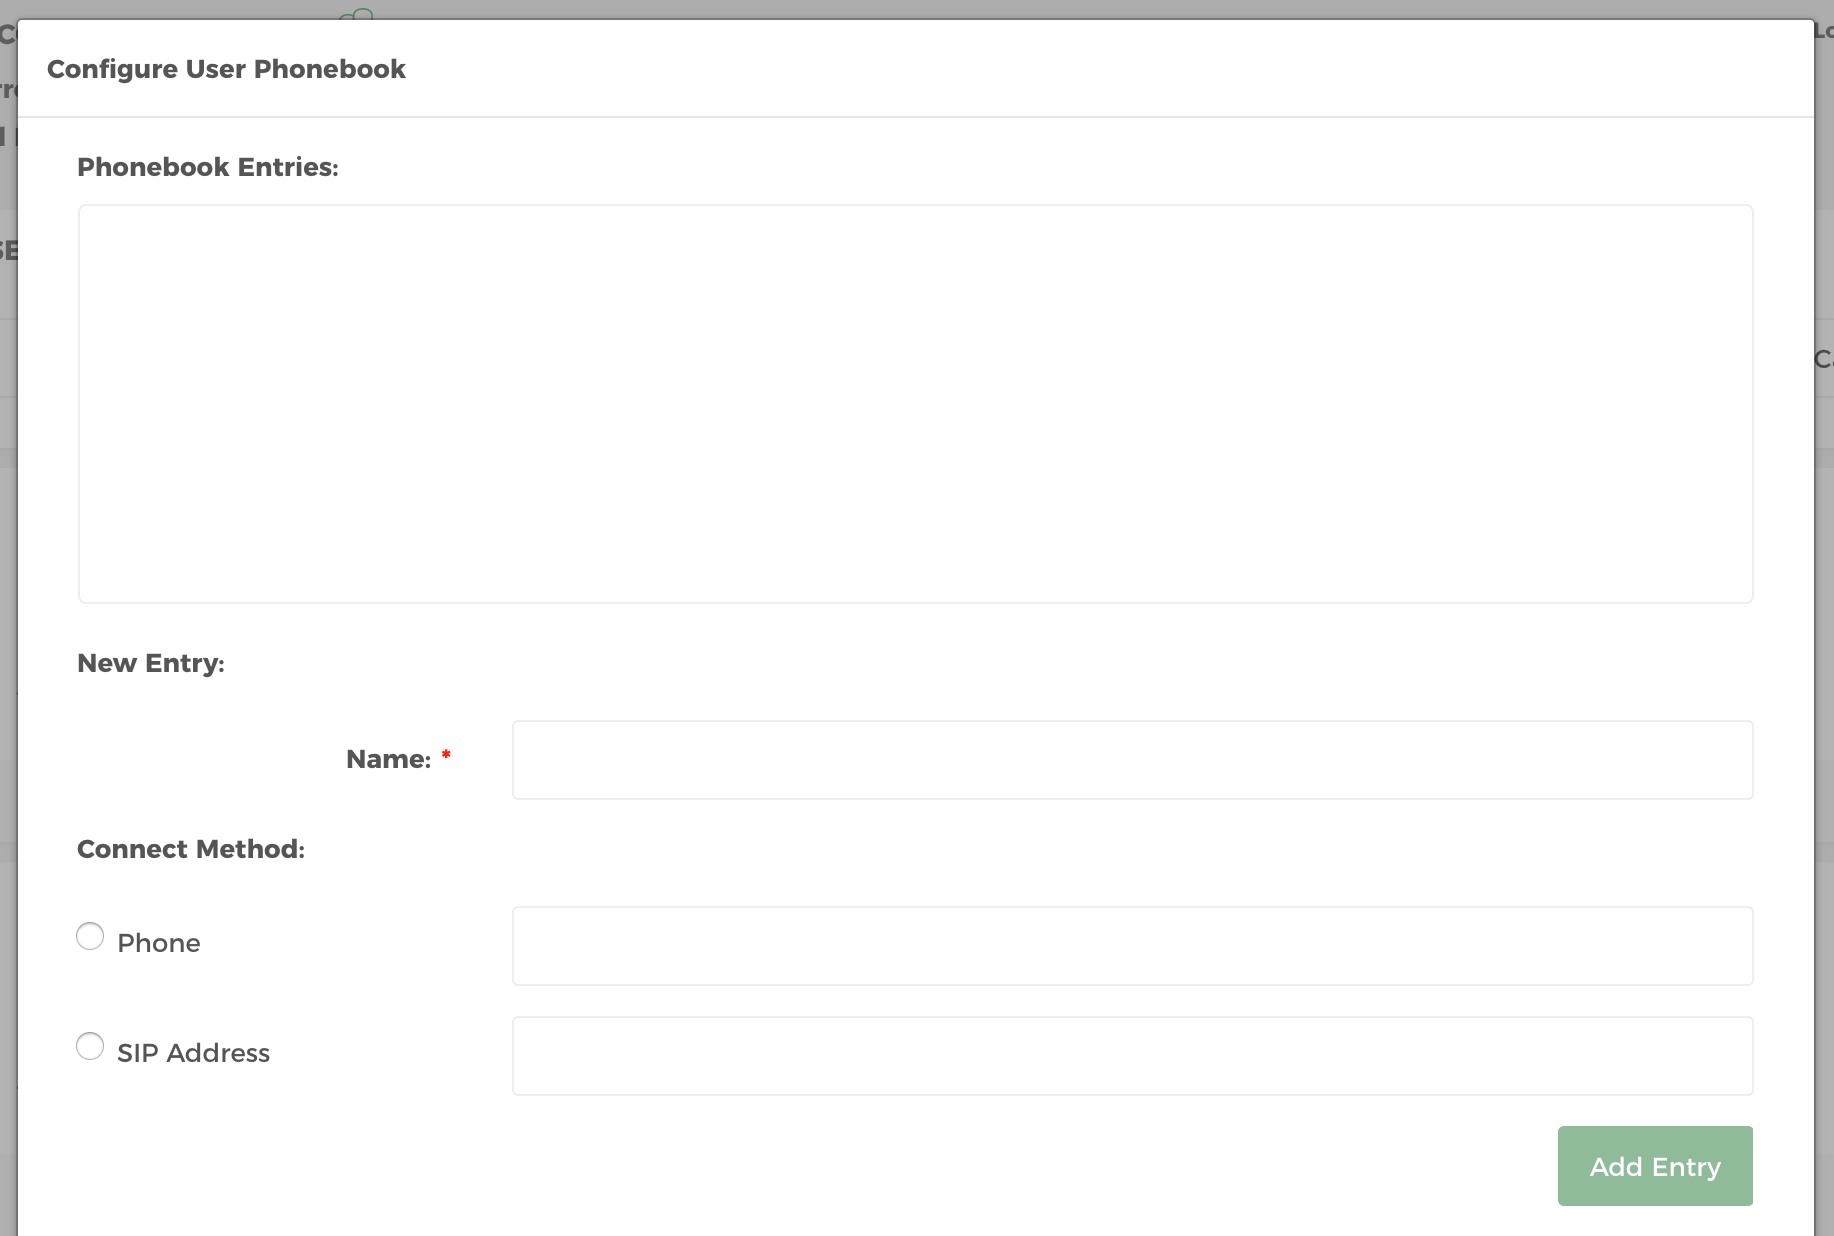
Setup Transfer or 3 Way Conference Call
Adding an entry into the phonebook allows agents to quickly transfer or 3-way conference commonly used numbers using a single click during a call. Phonebook entries can be added for either a standard telephone number (PSTN) or to a VoIP Address (SIP Address) using the add entry button. SIP Addresses should be entered into the format <extn>@<server>:<port> (ex. 106@ast.myco.com:5060). Phonebooks are unique PER user. Clicking the EYE icon will toggle the entries visibility in the Contact View menu.
Begin by clicking the Edit Phonebook icon under a user.
Admin Configurations
Manage Do Not Call list
Click the Manage Do Not Call List button under the setup panel. You can either upload a DNC list in .CSV format or manually enter in the textbox. Click Add to DNC button to save phone numbers.
Contacts need to be in a CSV format. Our systems do not support other types of contact files. We recommend using Excel to save the contact file as a CSV file.
Please ensure that you have the word “Phone” as name of the field that contains numbers. This is very important. Please do not use PHONE or any other variant. It is required to be Phone ( A capital P followed by lower case one) and specifying this differently will lead to upload errors.
To upload a group of numbers from a pre created CSV file click browse on the Manage Do Not call list Interface. Locate the your CSV file and then click upload. Click OK to the notification and then click Done to close the interface. You will receive an email with details of the import once complete. Please review this and should you have any issues please contact support@hellohunter.com.
To upload individual numbers to the DNC list add them into the text box in the Manage Do Not Call List interface, using one line for one number. Click Add to DNC. Click OK to acknowledge any notifications and click Done.

Note
If your contacts file is in Excel format, re-save it by clicking the File menu then click “Save As” and then choose CSV format.
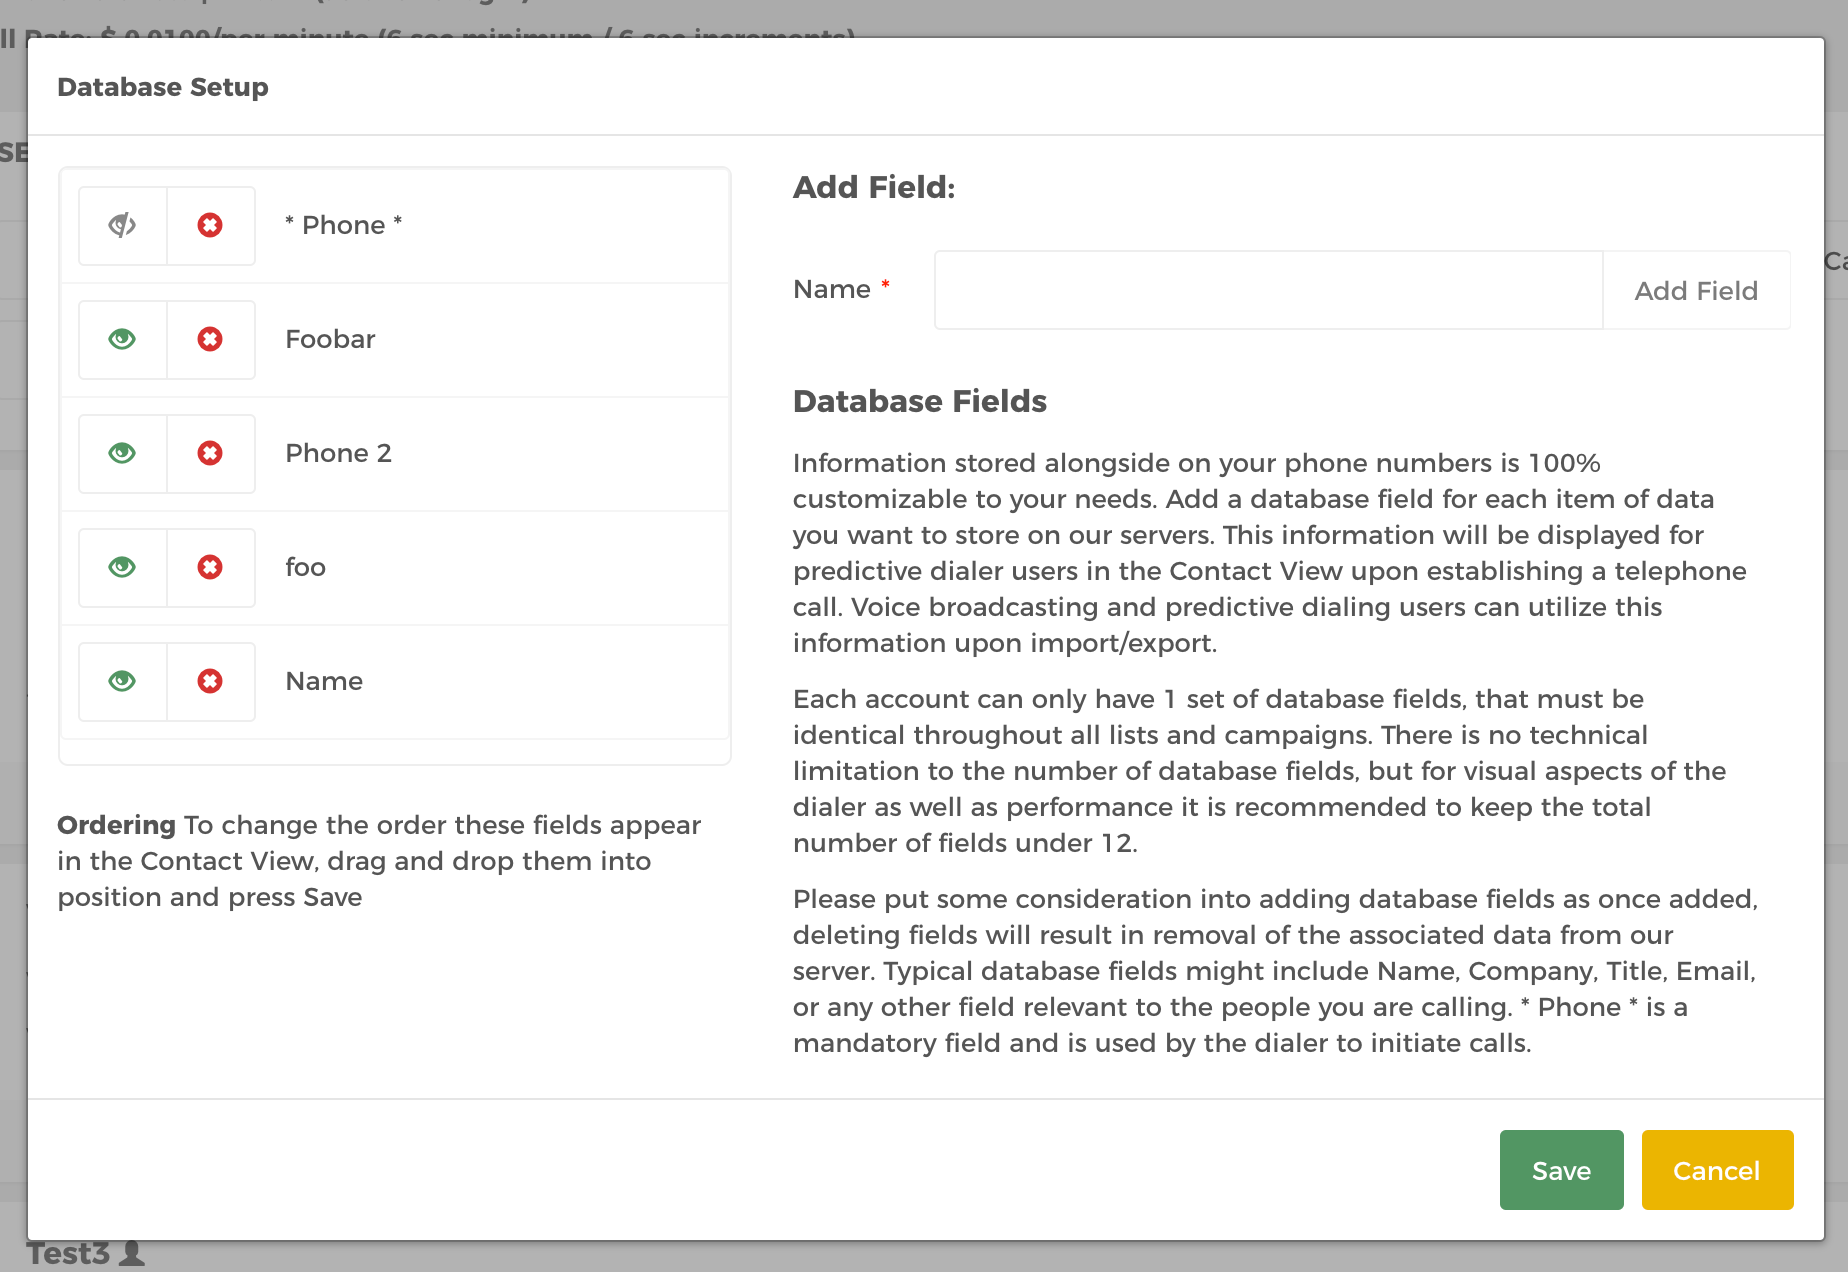
Setup Database Fields
Setup the fields that will be used in the systems database to store your contact list by clicking the Setup Database Fields button under the setup panel. By default there is only one field present on the system. This is the phone field that is used to store the your contacts telephone number. You should create additional database fields to store information about the contact such as name, address, company etc. The information will be displayed on the agent’s screen when they have a call connected to them. These fields are specified per account and cannot be changed from campaign to campaign.
Below, you will see the interface for customising your database. Type a new name into the name box and click add field. Repeat this process until you have all the fields you require.
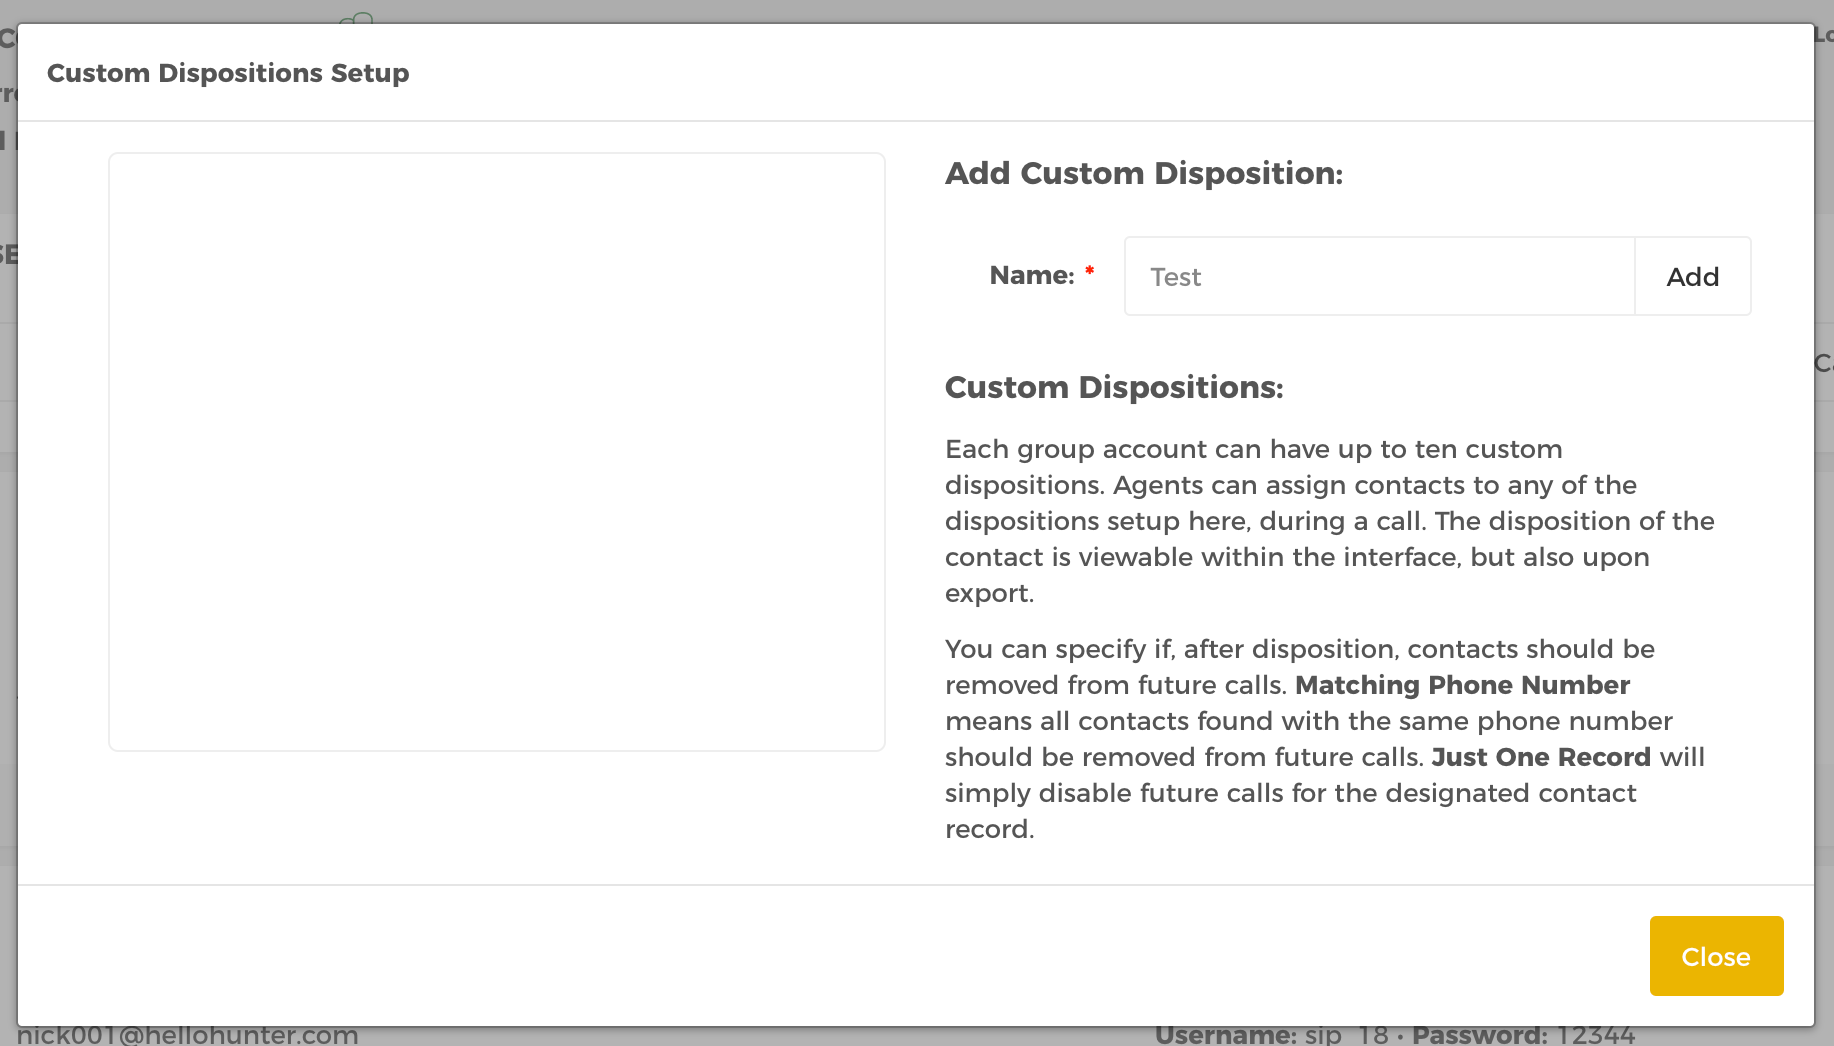
Configure Custom Dispositions
Click the Configure Custom Dispositions under the Setup panel. Enter a name for the custom disposition then click the Add button. The custom disposition should now appear inside the custom dispositions dropdown under the Dispositions bar in Contact View.
Display Agent Productivity
If for example you want to print or download your statistics, click the Display Agent Productivity button under the Setup panel. Choose a desired timeframe to generate report. Clicking the print button will popup the browser’s print function, while the save as CSV button will export and download your statistics in CSV file format.

Setup Inbound DIDs
Our predictive dialer can easily to be configured to accept inbound calls from any DID that you correctly map to our servers. Inbound calls are configured using dialer options and can be routed to any campaign that you choose. It is up to you whether you want to create a campaign for only agents taking inbound calls or you can blend inbound calls with outbound calls coming via a predictive campaign. Begin by clicking the Setup Inbound DIDs button under the Setup panel. Provide a number, description and to what campaign to send.
