Predictive Dialer Setup Guide
This is a copy of the email that you should have recieved when you signed up to use our service
Connect to your server using your browser of choice. We recommend using Google Chrome which can be downloaded here. Please ensure that you have the latest version of flash which can be downloaded here
Login to the system using the URL and username provided by our support team.
Setup DB Fields
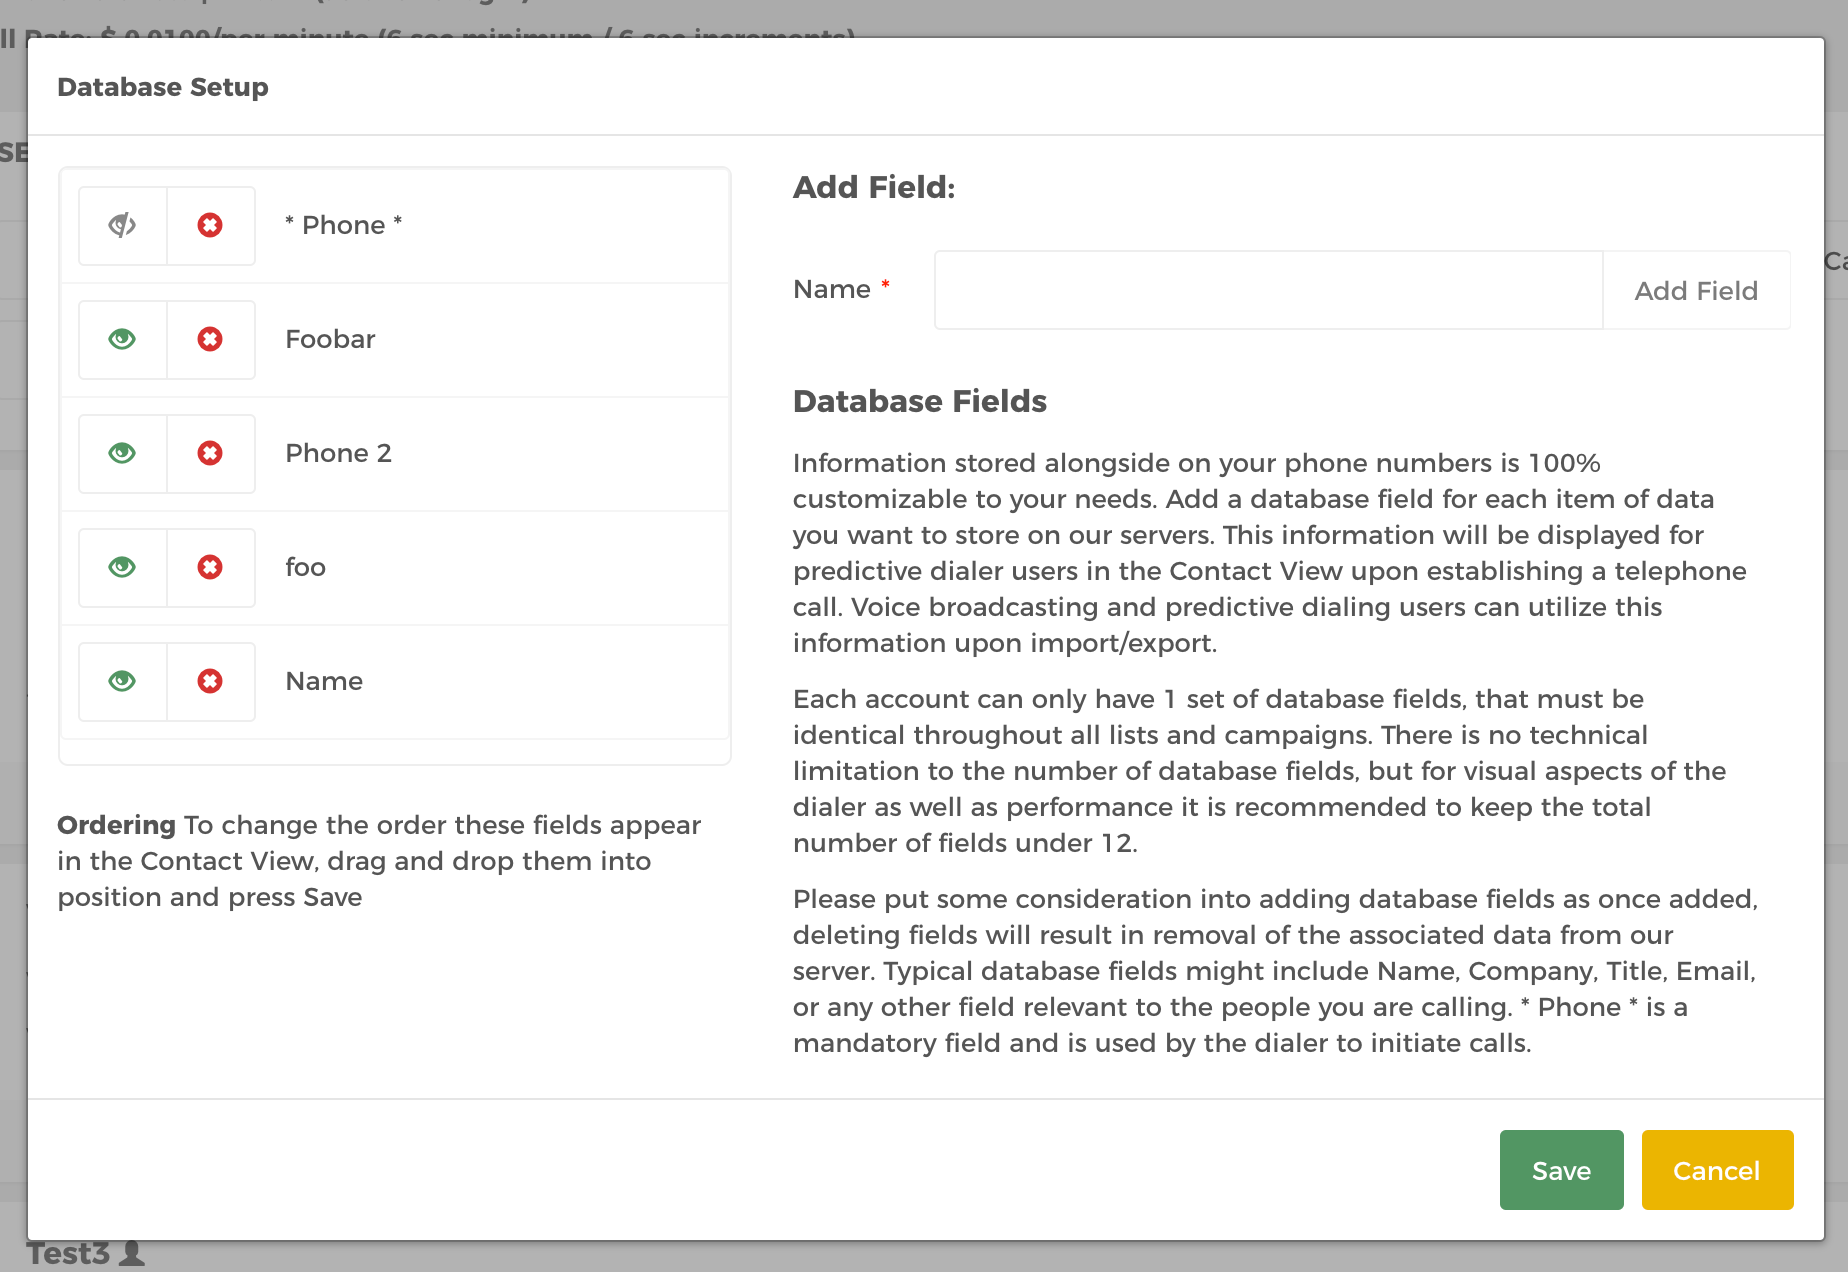
The first step is to setup fields that will be used in the systems database to store your contact list. By default there is only one field present on the system. This is the phone field that is used to store the your contacts telephone number. You should create additional database fields to store information about the contact such as name, address, company etc. The information will be displayed on the agent’s screen when they have a call connected to them. These fields are specified per account and cannot be changed from campaign to campaign.
Log into the system
Go to Admin by clicking the person icon on the lower part of the navigation area.
Under the Setup panel, click Setup Database Fields.
Below, you will see the interface for customising your database. Type a new name into the name box and click add field. Repeat this process until you have all the fields you require.
Add Users to the System
Go to Admin.
Click Create New User button on the top right hand corner of the screen.
You can either load settings from an exisiting user or create a new one.
Fill in fields. There are 3 tabs:
User Data tab: contains required user information.Privileges tab: lets you choose what the user is allowed to do or access.Tabs & Appearance: let’s you control what pages / features a user will see.
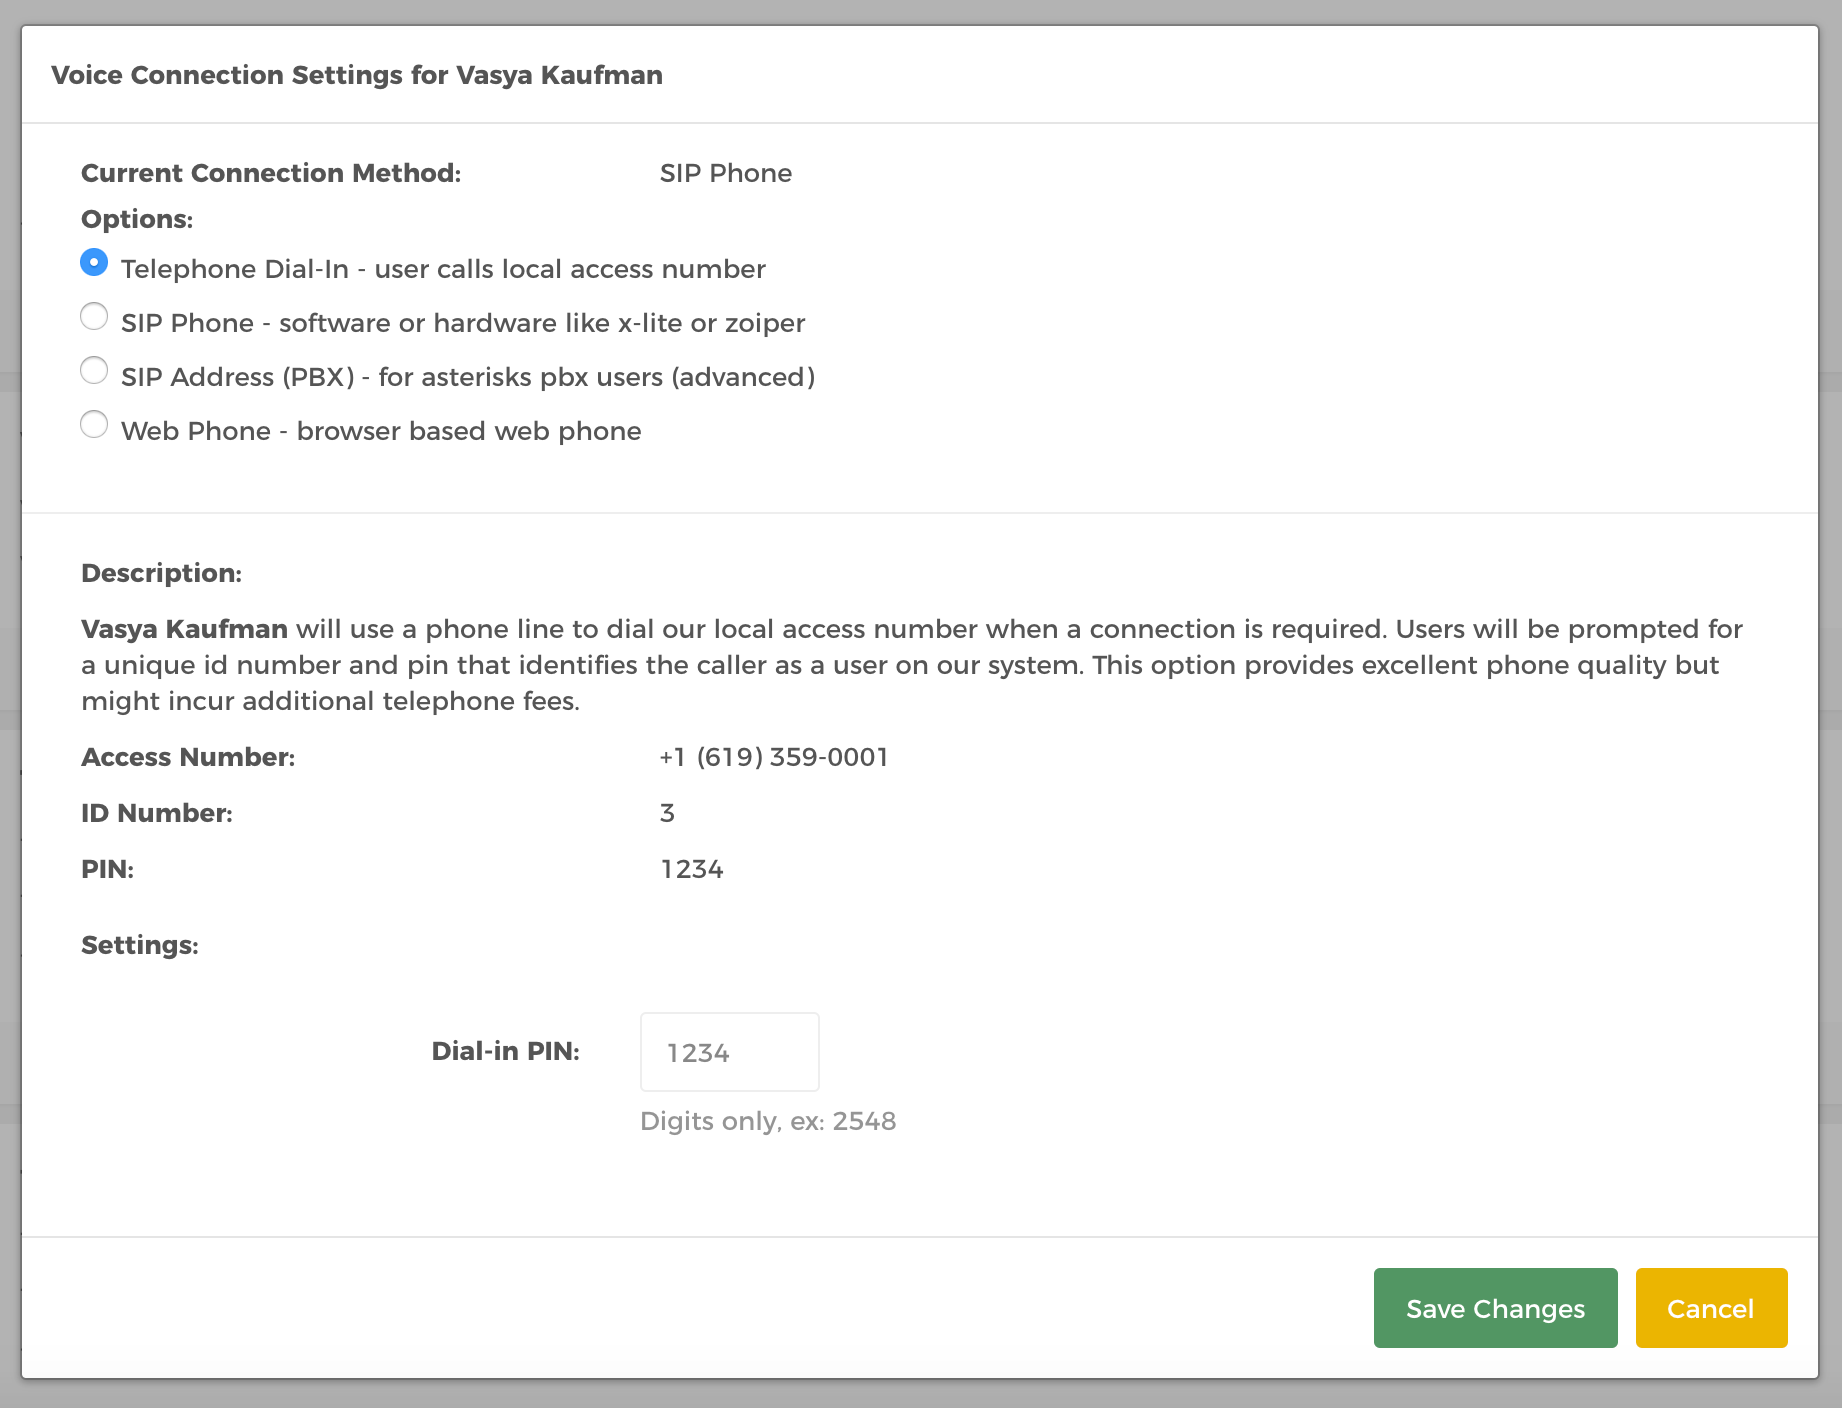
Specify a Connection Method
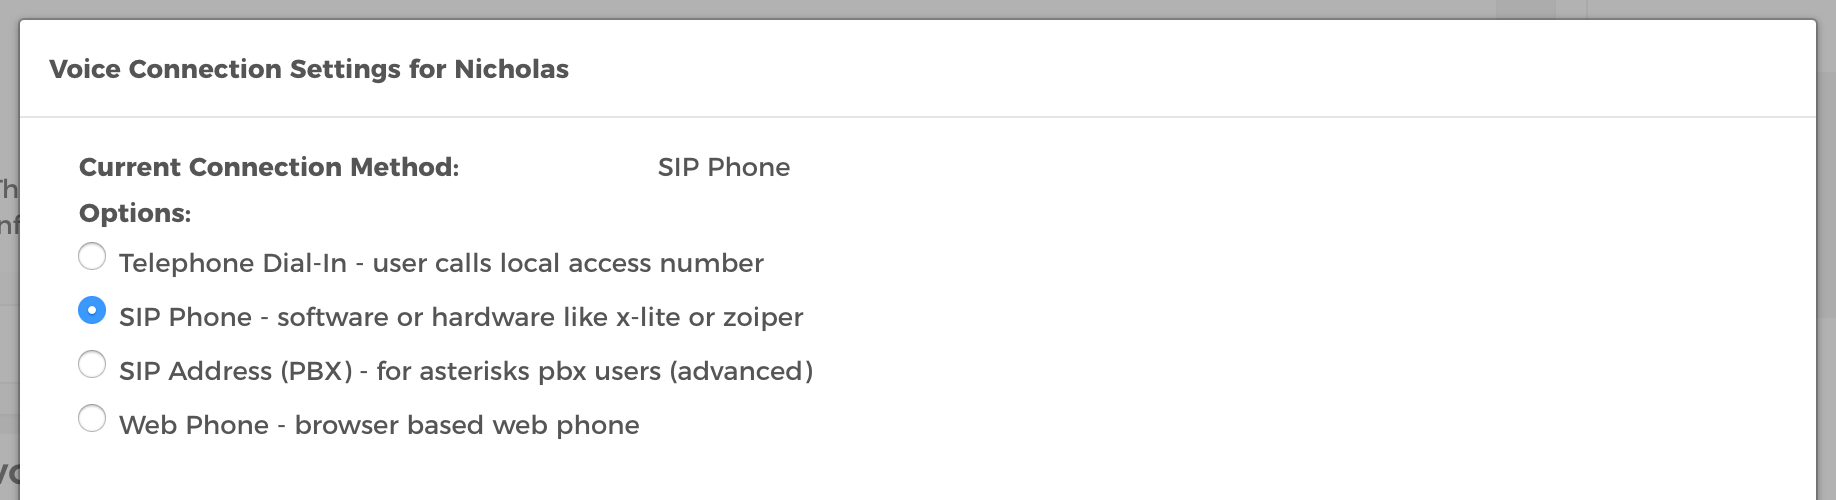
Specify a connection method for each user. We support 4 connection methods Telephone Dial in, SIP phone, SIP PBX and Web Phone.
Telephone Dial-In: User calls local access number.
SIP Phone: Software or hardware like x-lite or zoiper.
SIP Address (PBX): For asterisks pbx users (advanced).
Web Phone: Browser based web phone.
If you plan on using a SIP phone, we recommend first using the MyVoIPSpeed to ensure a quality connection. If a quality connection cannot be established we recommend using a normal phone to dial into our access number using the Dial-In method.
Go to Admin.
Under each User, you will see an array of icons. Click the Edit Connection Method icon. This is a blue icon that looks like a wifi connection signal.
Select the connection method for the user. At the bottom of the screen, the connection information will be given which will differ depending on the connection type used.
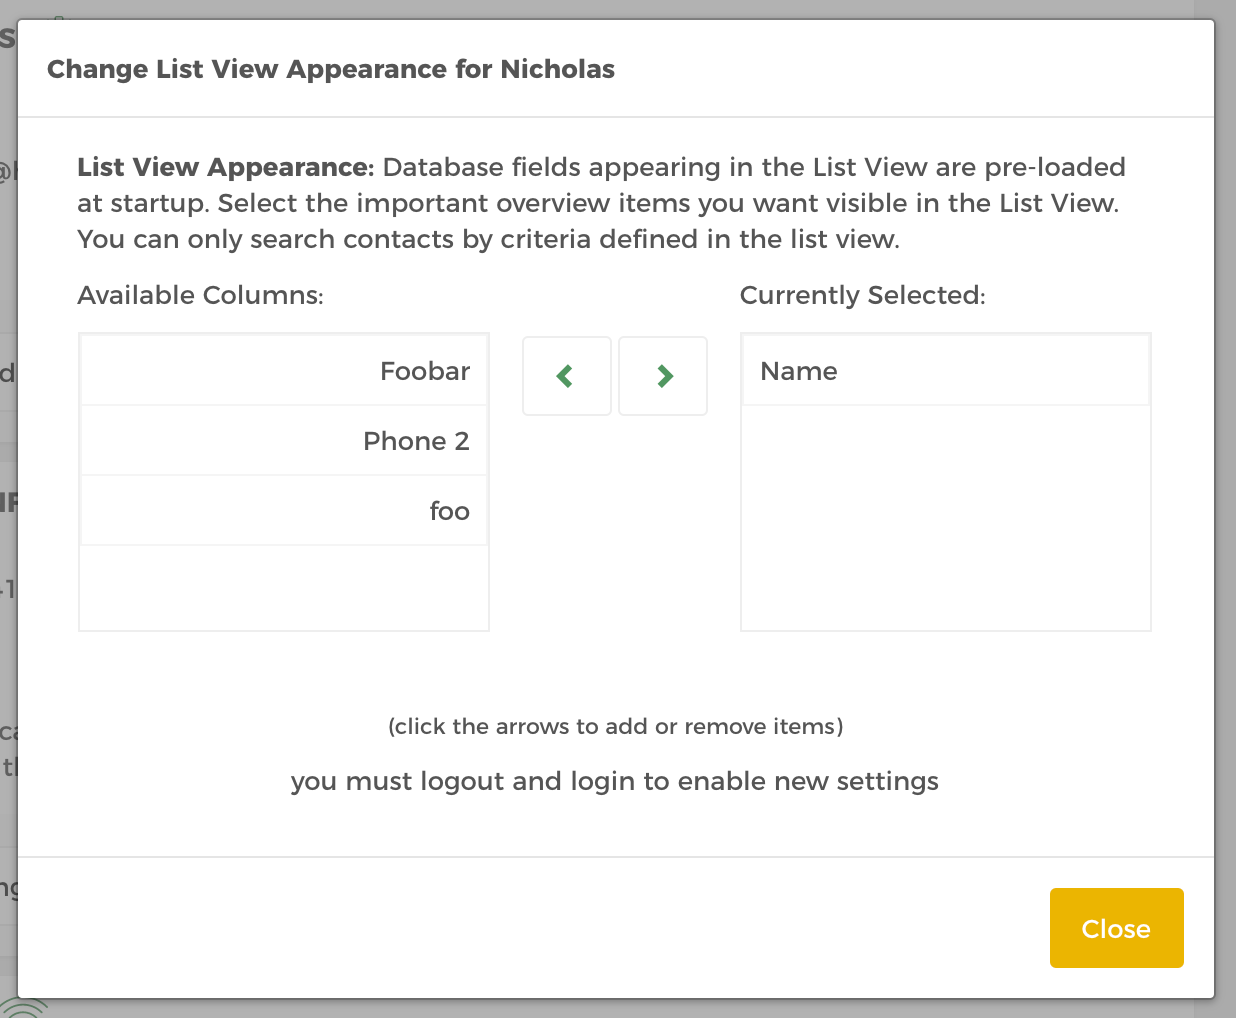
Configure the List View
Configuring the list view allows you to specify which database fields are shown when viewing the contacts via the List view. Adding database fields to the List view allows users to search based on the content of these fields. If a field is not added in the Change List View Appearance window you cannot use it as a search criteria.
Go to Settings by clicking the cog icon on the lower part of the navigation area.
Under the General Propoerties panel, click Change List View Appearance.
Select the column then click the right arrow to add to the currently selected list. Click the left icon to remove.
Create a New Campaign
Go to Campaigns page by clicking the Campaigns link on the navigation area.
Click the Create New Campaign button on the top right hand corner of the screen.
You can either load settings from an existing campaign or create a new one. If this is your first Campaign, you cannot use the Load Settings From feature. This is used to copy setting from an existing campaign to the new one you are creating.
Fill in the fields:
Name: Name of campaign.Description: Description of campaign.Caller ID Name / Number: Caller ID to use on calls made. It must be a valid phone number. Do not use 800 numbers.Limit Calling hours: Select check box and calling times to prevent dialing at inappropriate or unwanted timesDial Rate override: This is the number of lines assigned to an agentWait for agent: This is the amount of time in seconds a contact will wait for an agent before being hungup.Use AMD: Click to enable Answer Machine Detection.Record all: Click to record all agents calls in the campaign.
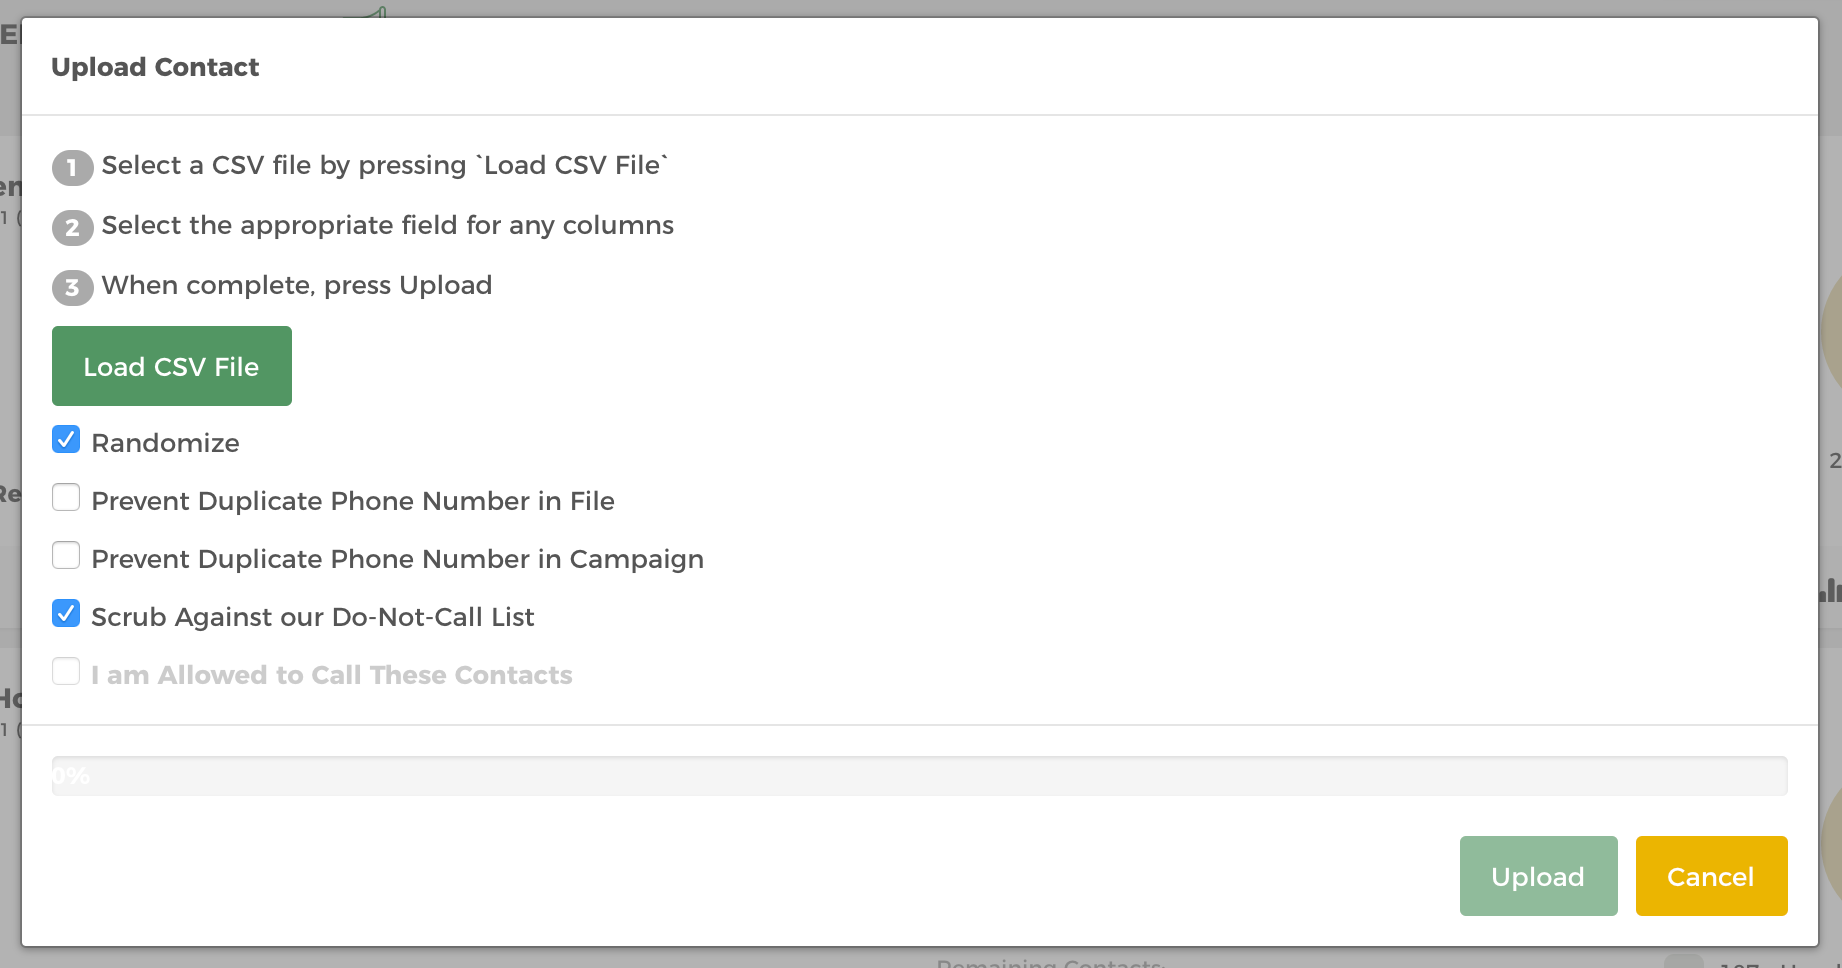
Upload Contacts / Leads
Upload contacts by clicking the plus icon under the newly created Campaign.
Follow the onscreen instructions:
Select a CSV file by pressing Load CSV File. Make sure that your CSV file have column names that match the field names that you are using. As a minimum you should have a column named phone in your CSV file. If you do not have this column named in the CSV file you will get import errors.
Note
If your contacts file is in Excel format, re-save it by clicking the File menu then click “Save As” and then choose CSV format.
Select the appropriate field for the columns.
Once you have all the database fields all correctly associated, proceed to the check boxes.
Randomizeleave checked: The Dialer will randomize the order in which the contacts are called in.Prevent Duplicate Phone Number in File: Duplicate numbers will be automatically scrubbed.Prevent Duplicate Phone Numbers in Campaign: Check and scrub duplicate numbers in the campaign.Scrub Against Our Do-Not-Call List: Checking this box will remove Federal Do Not Call numbers from your list.Finally, always check the
I am Allowed to Call these Contacts. Otherwise, you won’t be able to upload the contacts.When complete, press Upload.
Once uploaded, press the green refresh icon under the newly created Campaign to confirm your .CSV has been imported correctly. You will receive an email from the system when import is complete. Should you have any issues with this import please review the email.
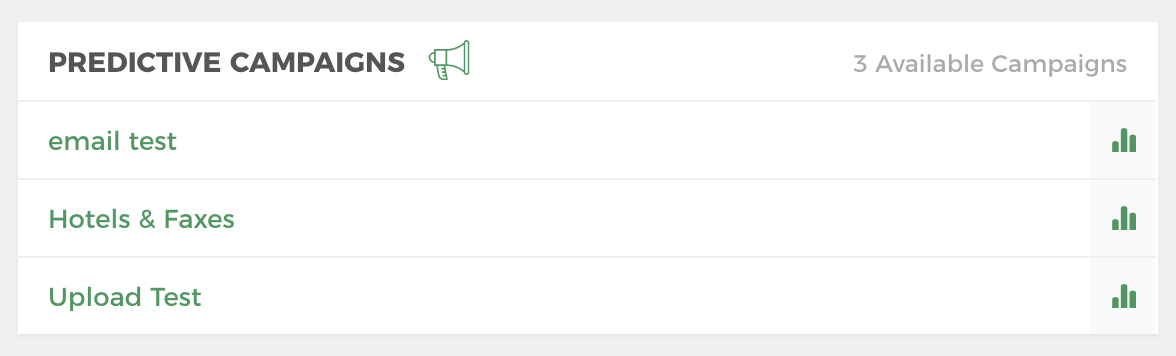
Begin Calling
Login as an agent using a user that you created in Step 2. Once logged in, you will be brought to the Dashboard. Click the newly created Campaign under the Predictive Campaigns panel to begin calling.
Make A Call via Web Phone
Check Voice Connection
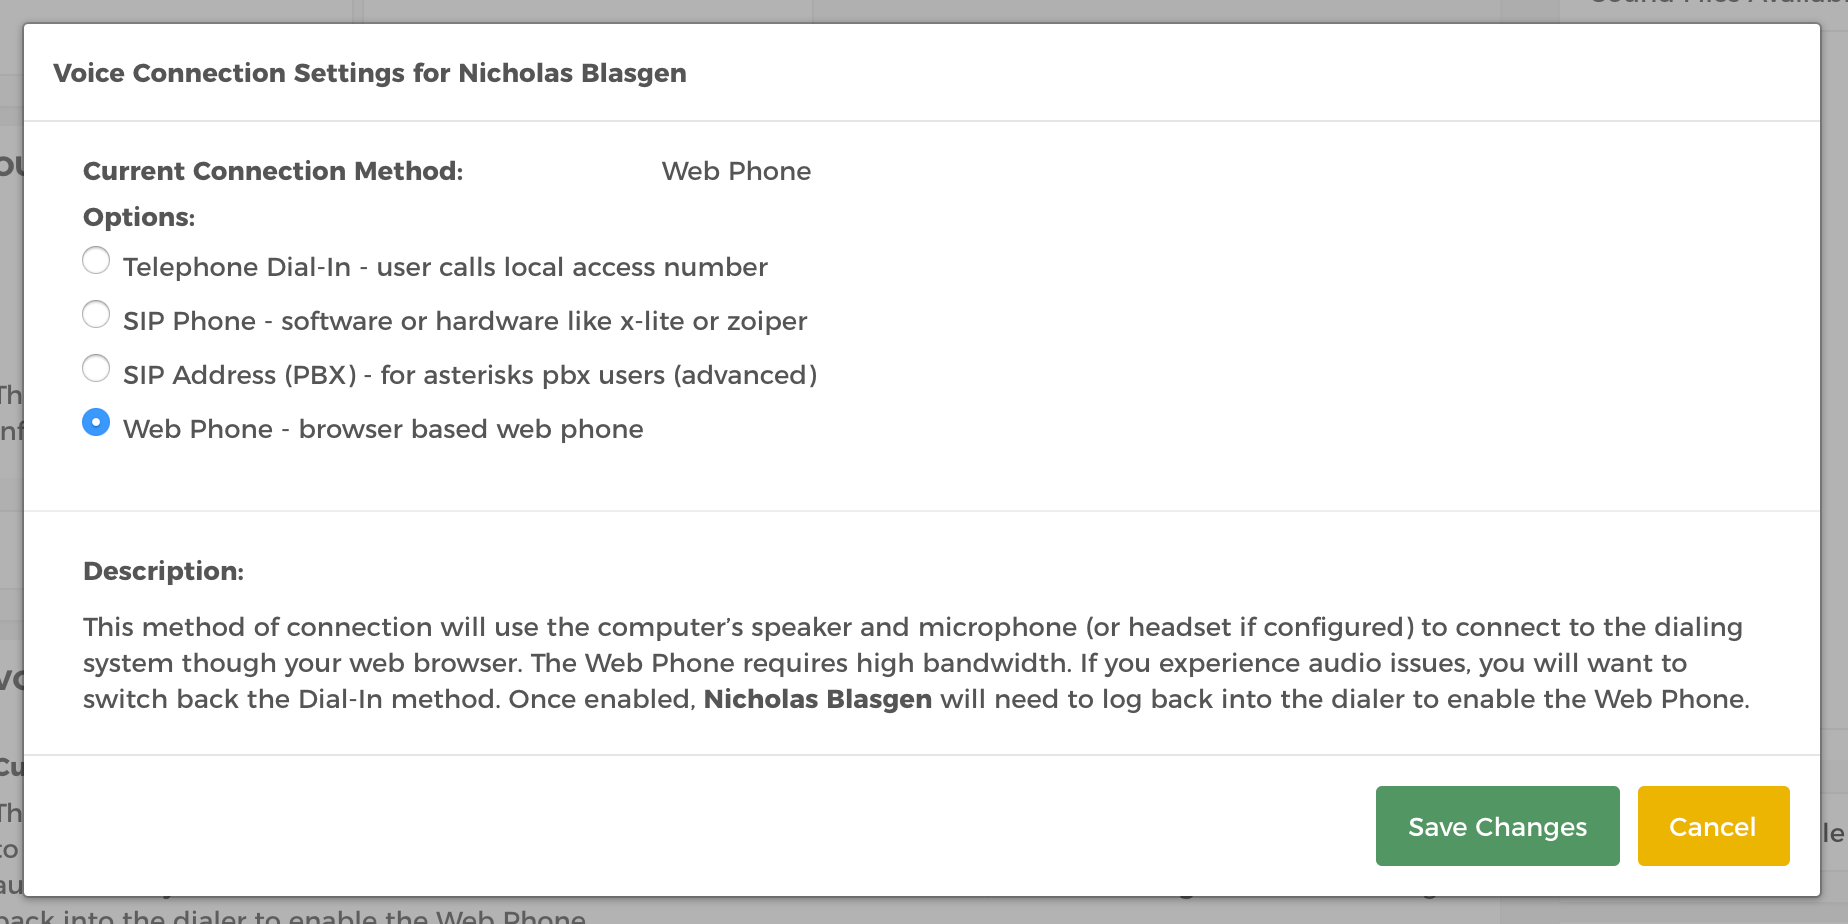
First, verify if you have the right connection method.
Go Settings by clicking the cog icon at the bottom of the navigation area.
Scroll down to Voice Connection panel and click Change Voice Connection Settings button.
Choose Web Phone from the options and click Save Changes button.
Dial-In
Login to the system using the URL and username provided by our support team.
Choose a Campaign from the Predictive Campaigns panel.
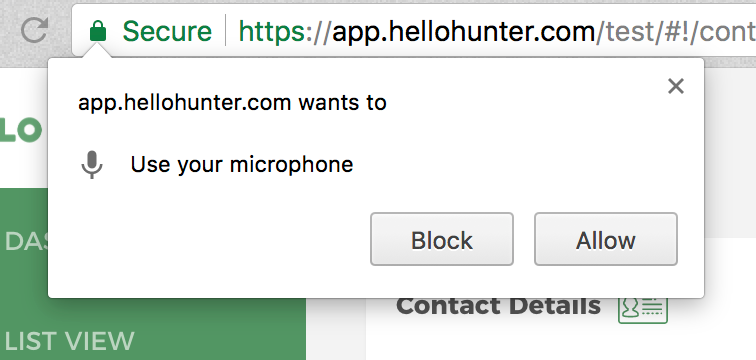
The dialer will ask for your permission to use your microphone / camera.
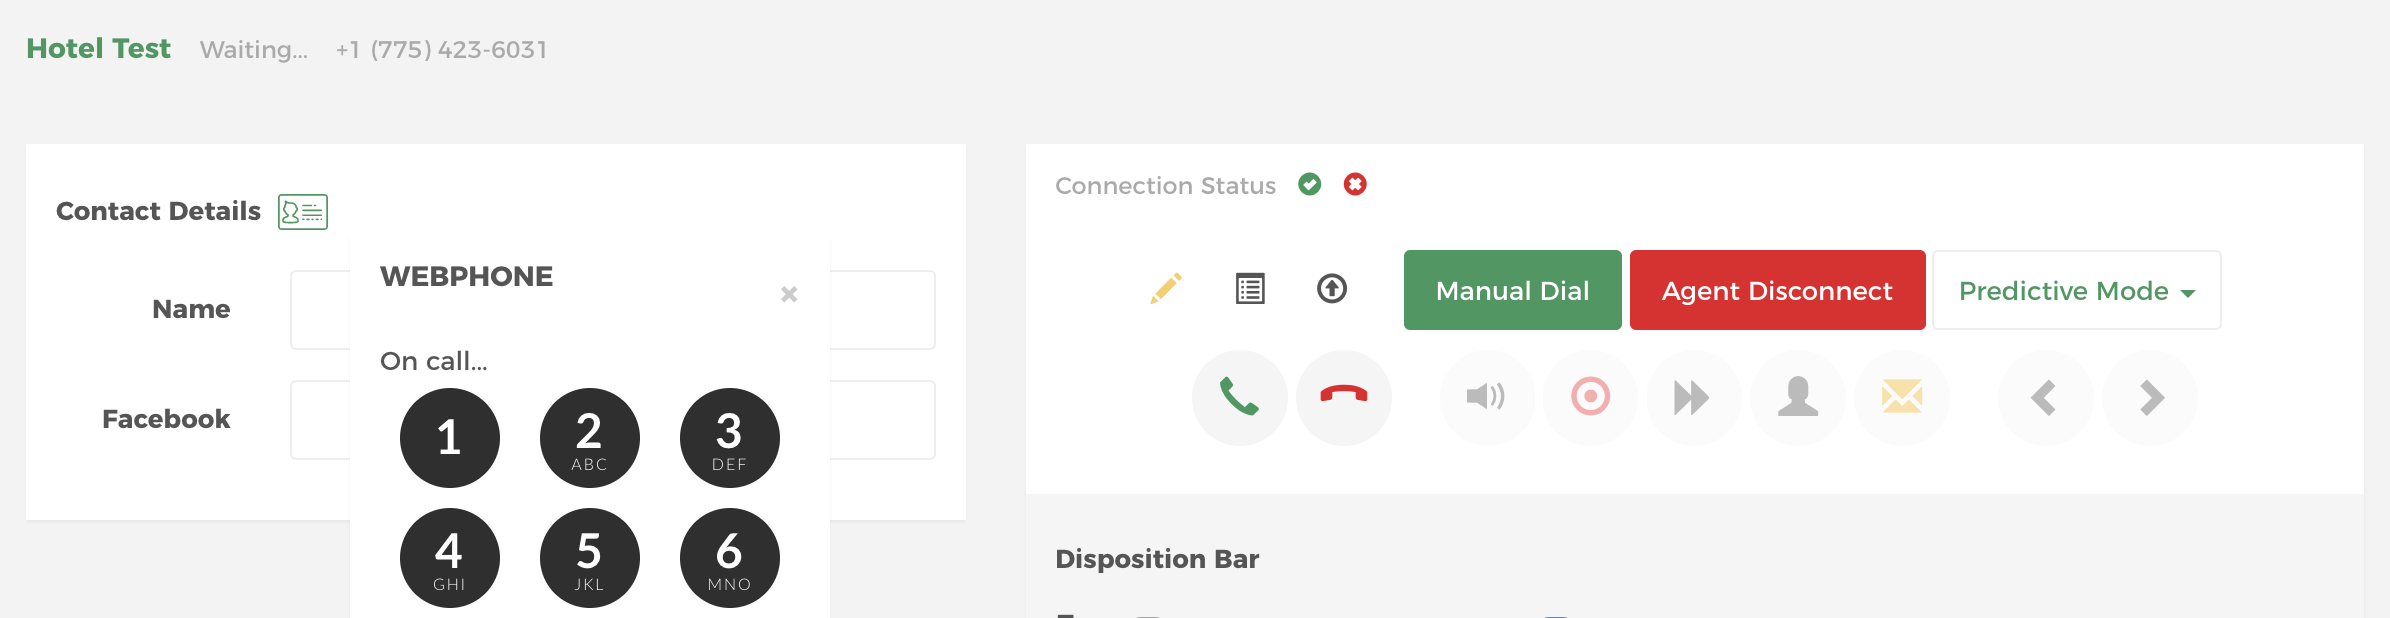
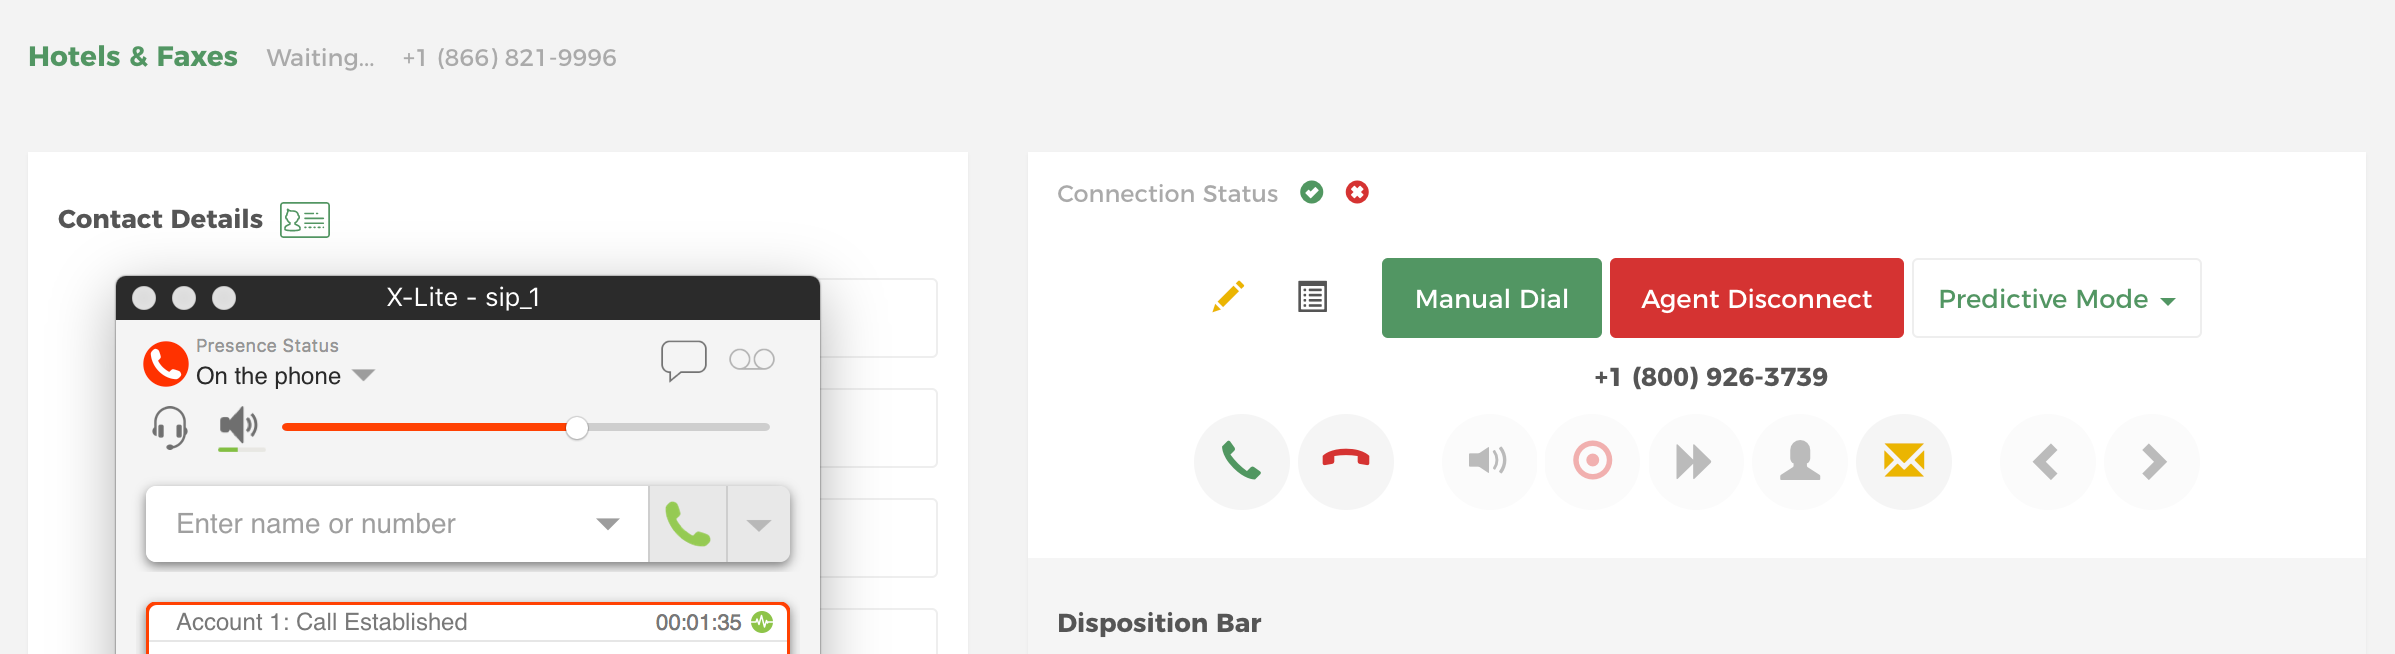
Here you will see the Contact View. Begin making calls by clicking the phone icon.
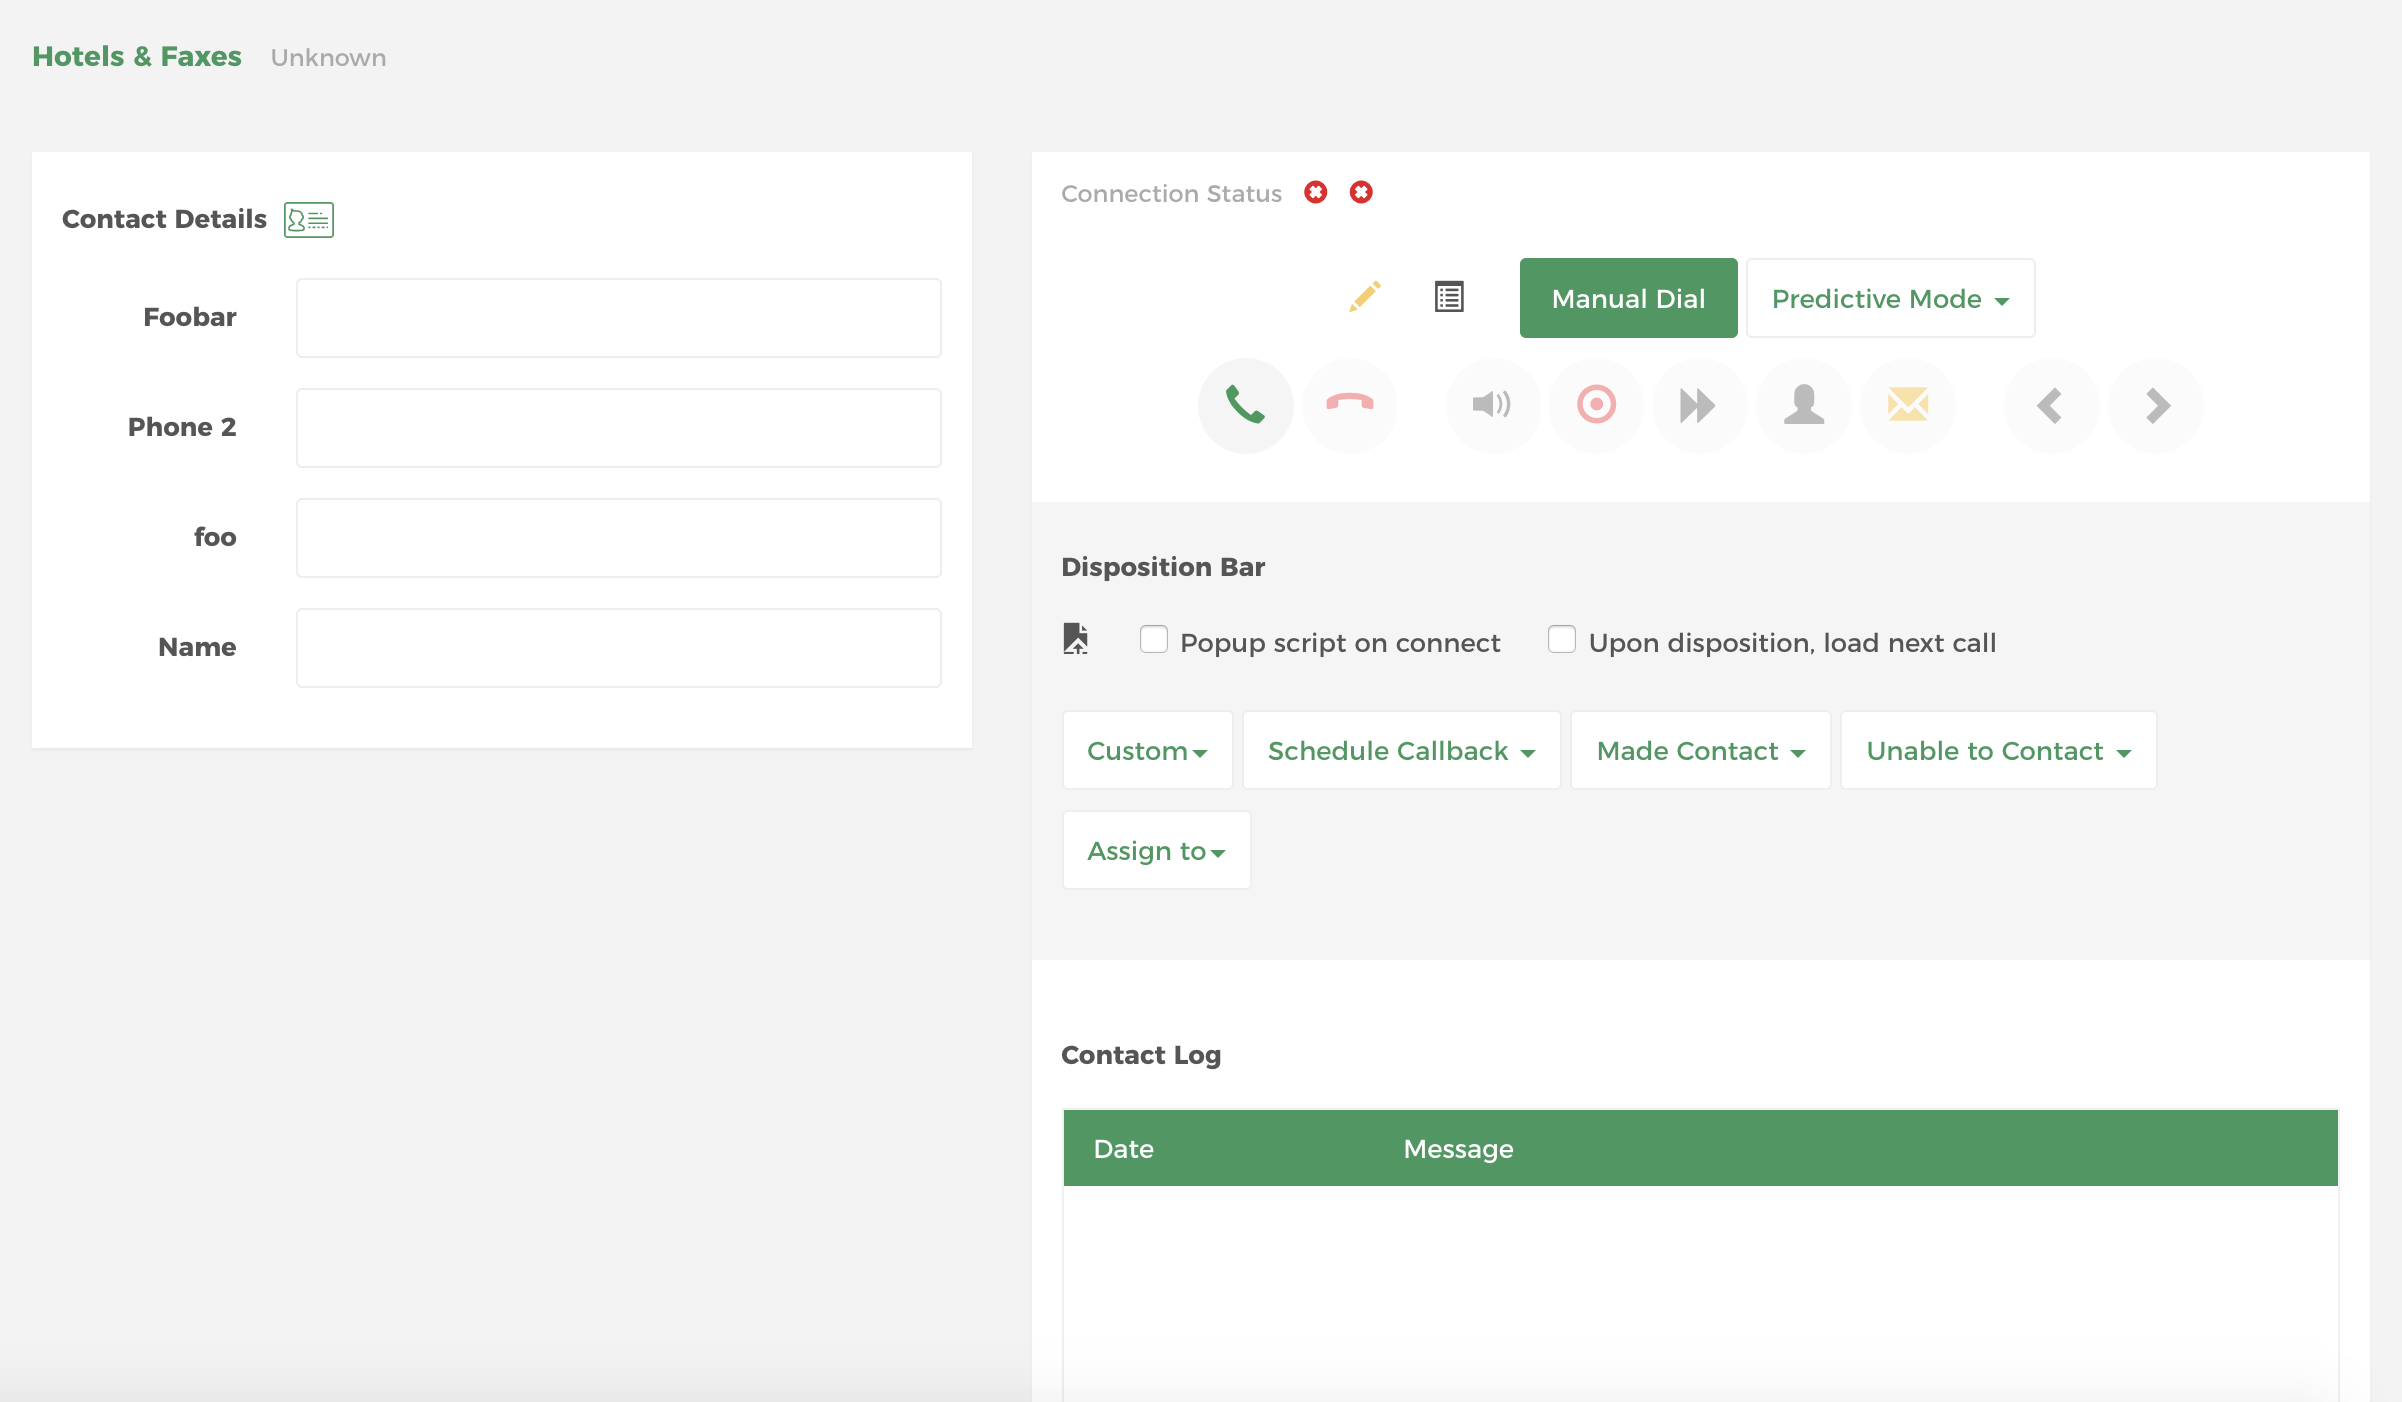
The status of the call will change from waiting to talking once you made contact.
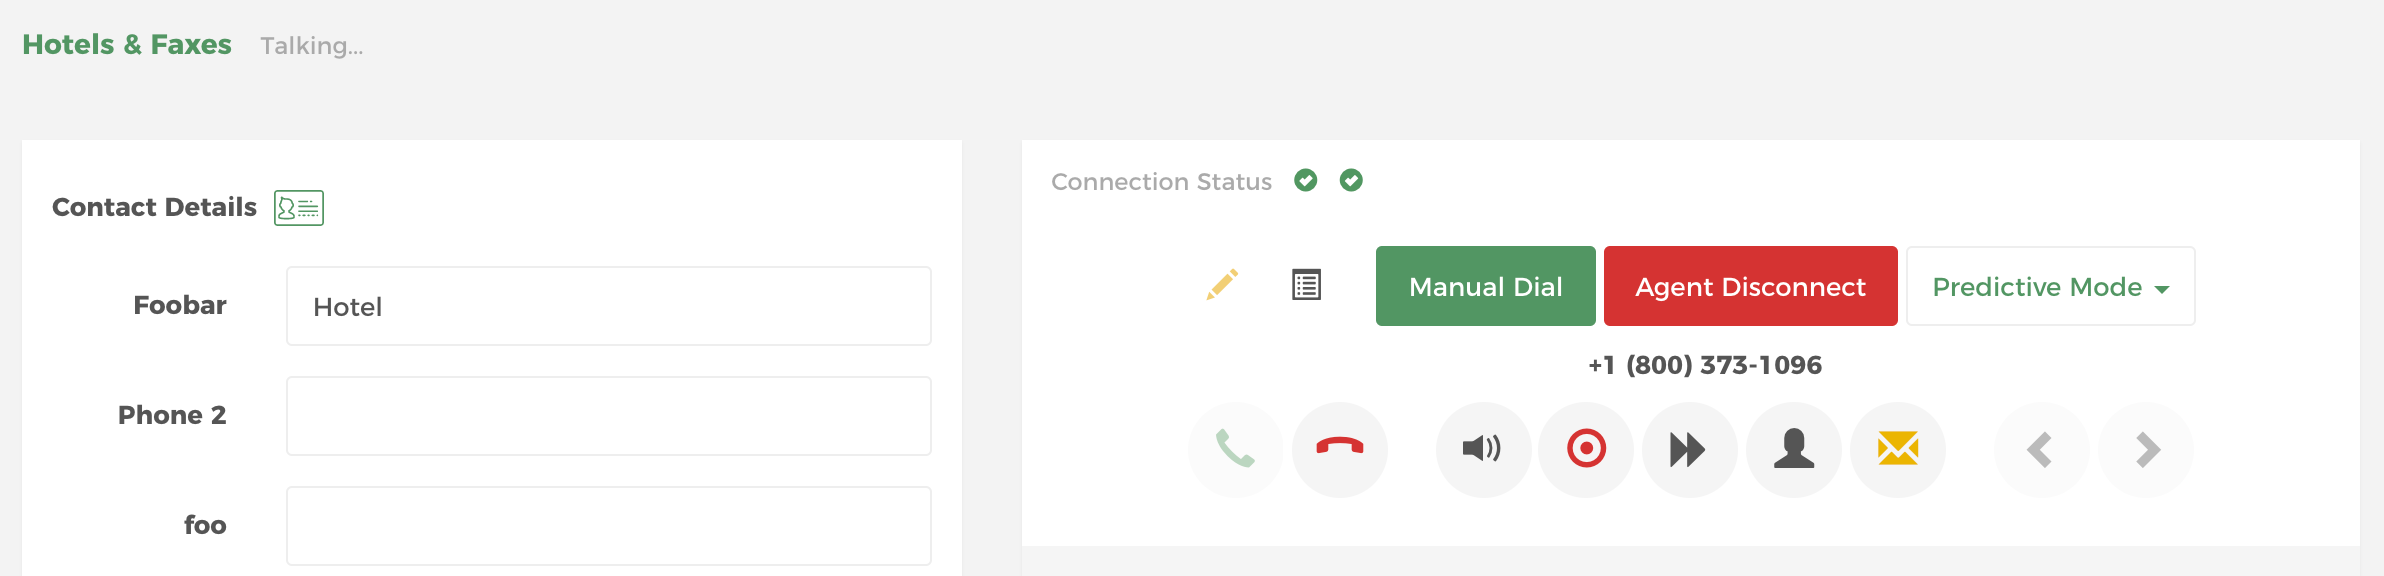
Use the control buttons to hangup, transfer, or move to the next call. You can also choose to automatically move to the next call by checking the
Upon disposition, load next callcheckbox.
Make A Call via SIP Phone
Check Voice Connection
First, verify if you have the right connection method.
Go Settings by clicking the cog icon at the bottom of the navigation area.
Scroll down to Voice Connection panel and click Change Voice Connection Settings button.
Choose SIP Phone from the options and click Save Changes button.
Download and Configure SIP Phone
For this demo, we will use X-Lite. It is a free VoIP SIP softphone by Counterpath. Go ahead and download it here.
Launch X-Lite.
Go to Preferences then Accounts tab.
Add an account using the credentials found in your Voice Connection Settings.
Go to Settings
Scroll down to Voice Connection panel then copy the settings to X-Lite.
If the settings are correct, your X-Lite status should now become Available.

Dial-In
Login to the system using the URL and username provided by our support team.
Choose a Campaign from the Predictive Campaigns panel.
Here you will see the Contact View. Begin making calls by clicking the phone icon.
The status of the call will change from waiting to talking once you made contact.
Use the control buttons to hangup, transfer, or move to the next call. You can also choose to automatically move to the next call by checking the
Upon disposition, load next callcheckbox.