Voice Broadcasting Setup Guide
Login to the Voice Broadcasting system using the information that was provided by our support teams. Upon logging in, you will see a number of links on the navigation area. Click Voice Broadcasting. Here you will see the following screen:

This screen contains all the information that is related to your campaign. You are able to see your account balance, create new voice broadcasts, and configure options. If unlimited plans have been purchased from us, you will not be able to see your account balance.
Create a New campaign
Click the Create Voice Broadcast button on the top right hand corner of the screen.
If this is your first Broadcast you do cannot use the Load Settings From feature. This is used to copy setting from an existing campaign to the new one you are creating.
General tab

Campaign Name and Description: Name of your campaign and a brief description.Caller ID Name and Number: This is the CID information that will be used on the outbound calls generated by the system. This is what the client will see on their end. It is important to use real phone numbers. Using an invalid CID is not permitted by our service. Do not use 800 numbers.Never Call Before and Never Call After: Allows you to specify when the campaign should run. You need to configure your timezone correctly for this feature to work. This can be changed via Settings. Under General Properties, click the pencil icon beside Timezone.Options tab
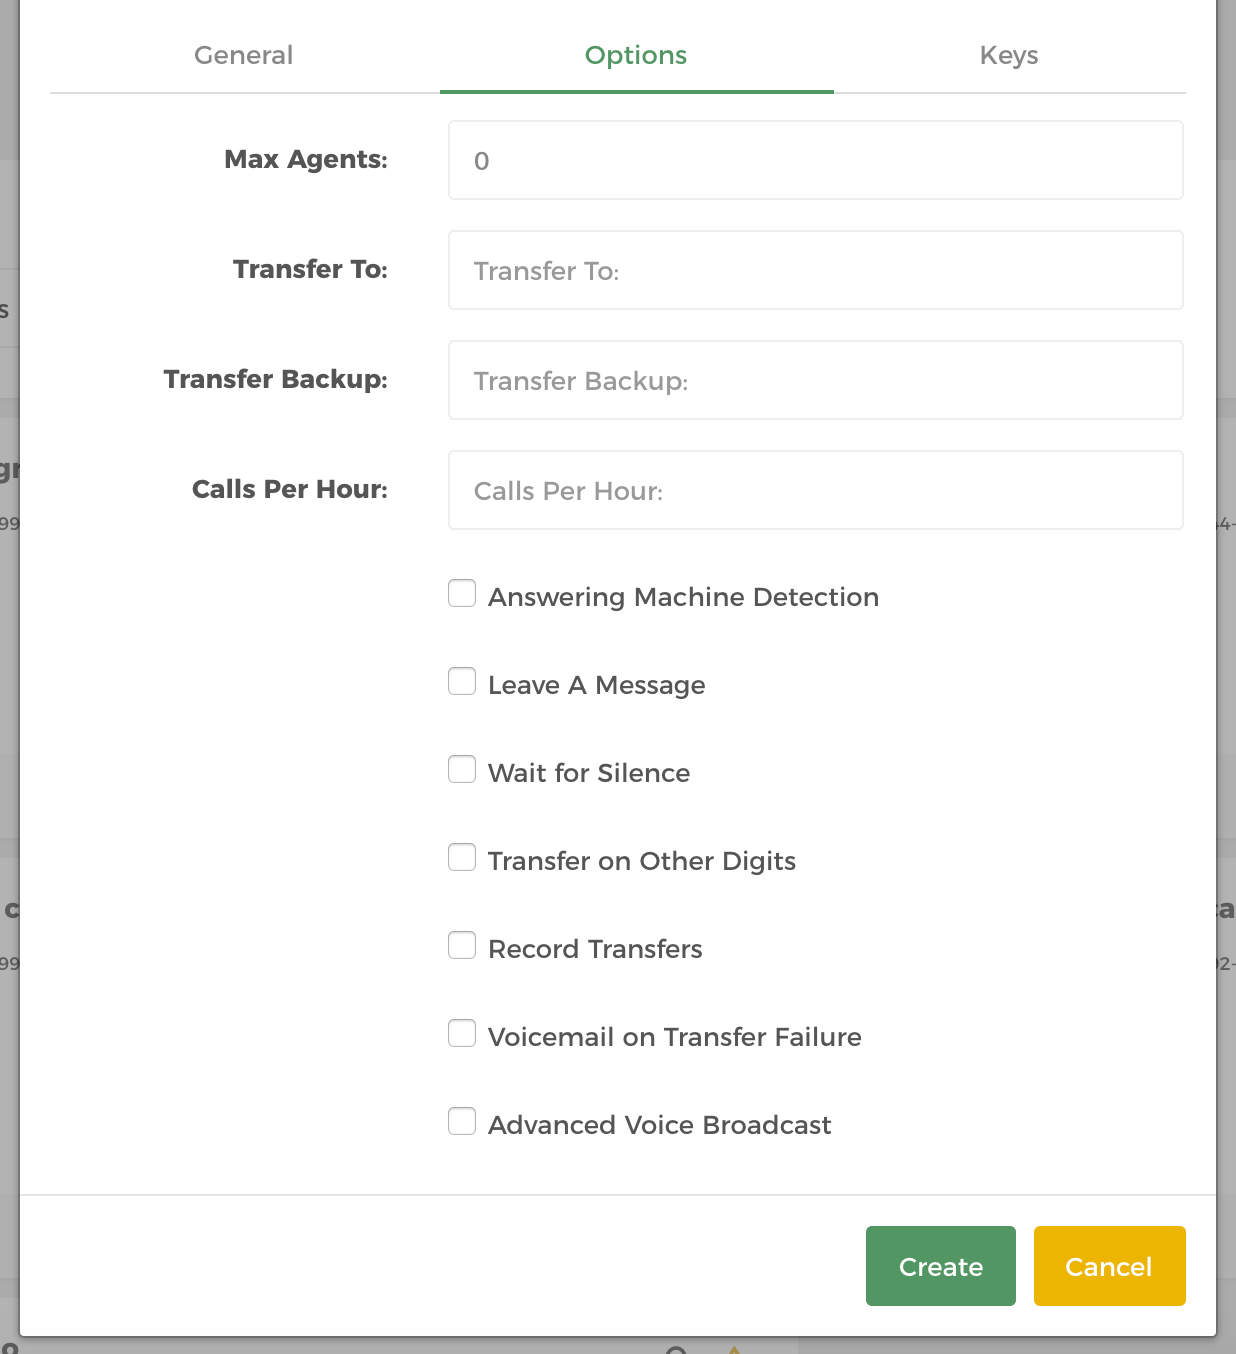
Max Agents: This is the total number of agents available to take calls that the dialer transfers.Transfer To and Transfer Backup: When running a voice broadcast you can give the recipient the option to be transferred to an agent.Calls per Hour: This is the number of calls that you want to dial per hour.Answering Machine Detection and Leave a Message: Please select one of these options. AMD will drop the call upon detecting an answering machine. The detection takes around 2-3 seconds and due to the way the technology is implemented there may be some occasions where detection is not successful. Our system has one of the best detection rates in the Industry, however you should be aware that this is not going to be 100% accurate at all times. Leave a message setting is used to leave a preconfigured message when a voice mail is detected.Wait For Silence: This adds some silence before playing your message. It is recommended that you test this feature first. This option instructs the dialer to not play a message unless someone on the other end speaks, otherwise your message will be played as soon as someone picks up.Transfer on Other Digits: When this box is checked, the dialer transfer the call if the contact presses any button at all.Record Transfers: Records calls that are transferred to the transfer number.Voicemail on Transfer Failure: Transferred calls are sent to voicemail if unanswered.Advanced voice broadcast: This option allows the voice broadcast to anything else that a customer might want. If they’re doing anything more complicated than just playing 1 audio file to a person with Transfer & DNC buttons, then we create a custom script.Keys tab
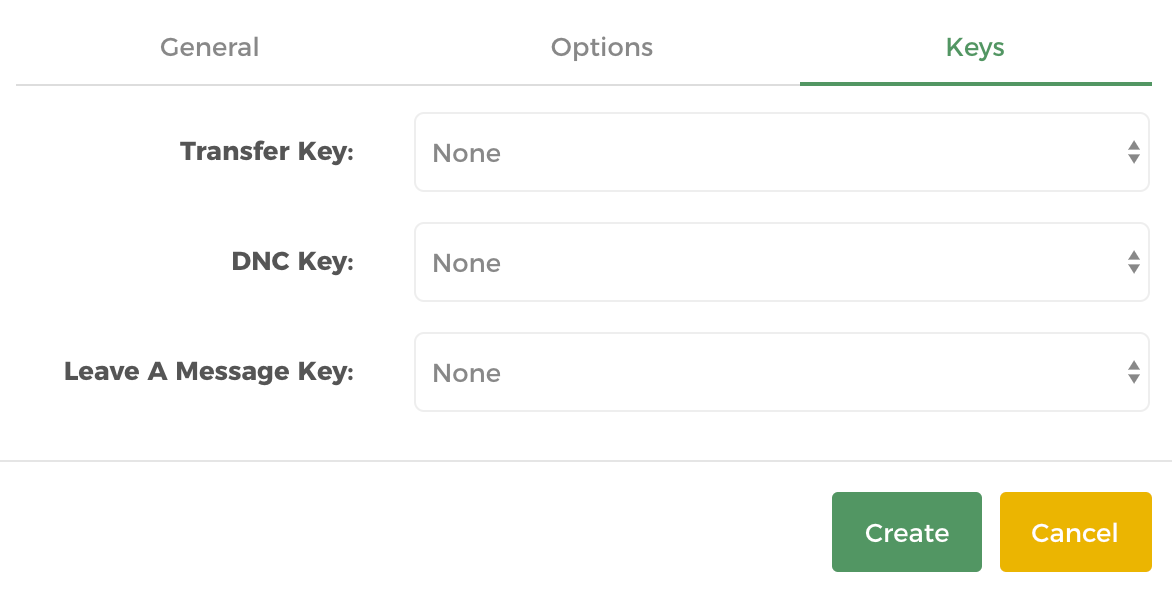
Transfer Key, DNC Key and Leave a Message key: These settings are used to map these features to specific key presses.Lastly, click the Create button. You should now see the newly created Campaign.
Upload Contacts / Leads
You campaign requires a list of contacts that will be called. This data is stored in a contacts file which is uploaded to the system. This file needs to be in a CSV (Comma Separated Values) format and must contain at least one field that contains the telephone numbers. This column must be called Phone.
Upload contacts by clicking the add or recycle contacts that looks like a plus icon under the newly created Campaign.
You have 3 options to upload contacts: by Uploading a CSV file, by Recycling existing contacts, or by Moving contacts from another broadcast. In our case, choose uploading a CSV file then click the Go button.
Follow the onscreen instructions:

Select a CSV file by pressing Load CSV File. Make sure that your CSV file have column names that match the field names that you are using. As a minimum you should have a column named phone in your CSV file. If you do not have this column named in the CSV file you will get import errors.
Note
If your contacts file is in Excel format, re-save it by clicking the File menu then click “Save As” and then choose CSV format.*
Select the appropriate field for the columns.
Once you have all the database fields all correctly associated, proceed to the check boxes.
Randomizeleave checked: The Dialer will randomize the order in which the contacts are called in.Prevent Duplicate Phone Number in File: Duplicate numbers will be automatically scrubbed.Prevent Duplicate Phone Numbers in Campaign: Check and scrub duplicate numbers in the campaign.Scrub Against Our Do-Not-Call List: Checking this box will remove Federal Do Not Call numbers from your list.Finally, always check the
I am Allowed to Call these Contacts. Otherwise, you won’t be able to upload the contacts.When complete, press Upload.
Upload a Message to Broadcast
Click the Add or Upload Message icon. This is a circled arrow icon beside the plus icon.
Click the Add Sound File button.
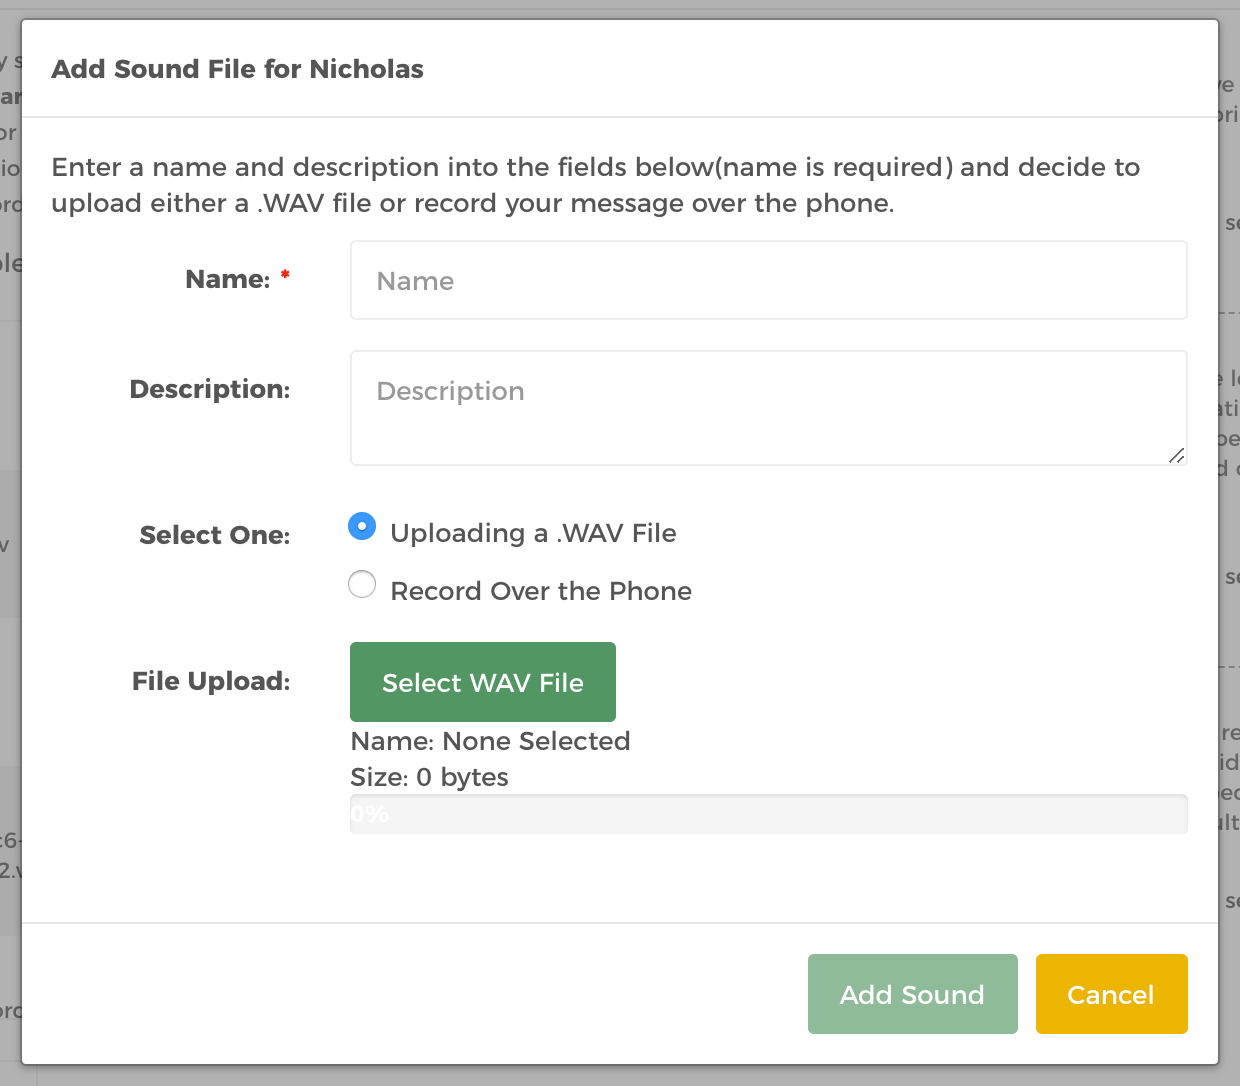
Enter a name and description. Then choose from the two options:
Uploading a .WAV file: Browse your computer for a wav sound file and click Open.Record Over the Phone: Choose the number you wish the dialer to call you. When dialed and prompted, record your message over the phone.Click Set as Broadcast Message beside the newly created sound file. You should see the a message indicating that the file you have uploaded is the current broadcast selection.

Lastly, click the Copy Sound Files button. You can add other sound files to play as your Voicemail and Inbound Message.
Send a Test Call
We recommend that you use the Send Test Call feature to test the campaign configured to see if it produces the expected results. This feature allows a single call to be made to a specified number. You should not proceed to the next step of running a full broadcast if you have not tested your configuration. Doing so may be expensive for you.
Begin test call by clicking the yellow paper plane icon.
Run your Broadcast
The system is now configured and the voice broadcast campaign can be run by clicking the Start button. This looks like a play button icon.