Settings
You can go to the Settings by clicking the cog icon at the bottom of the navigation area.
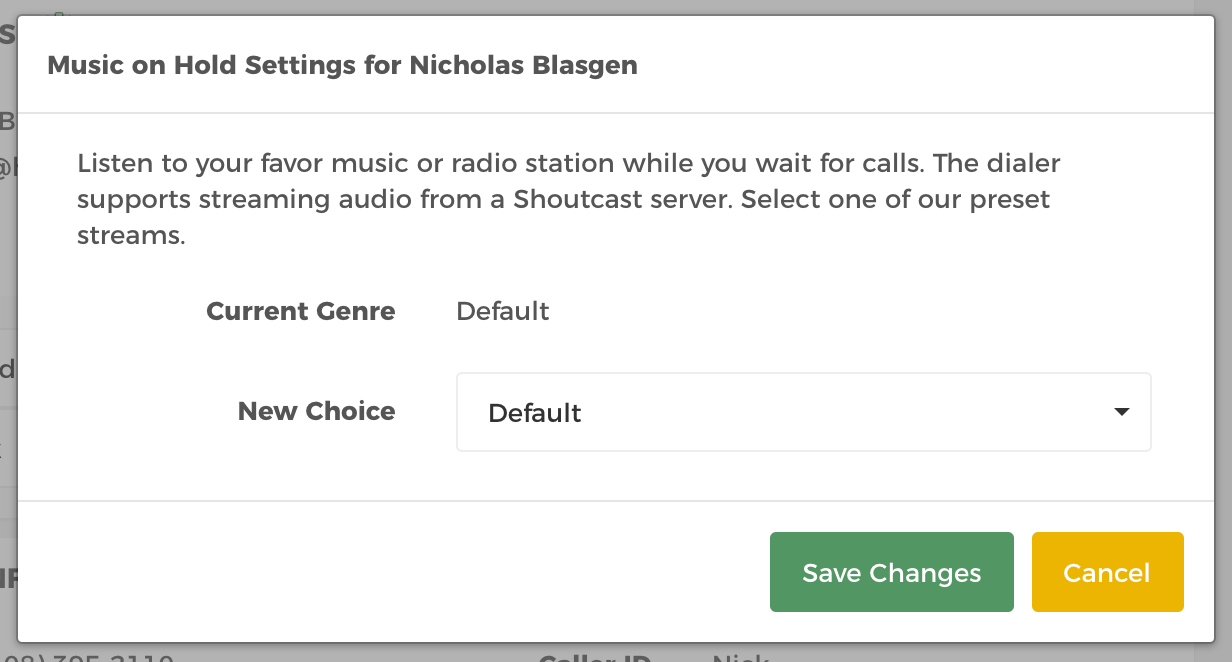
Edit Music on Hold
Under General Properties panel, click the pencil icon under the MOH label. It’s short for Music on Hold. Choose a new music on hold from the dropdown. Save any changes.
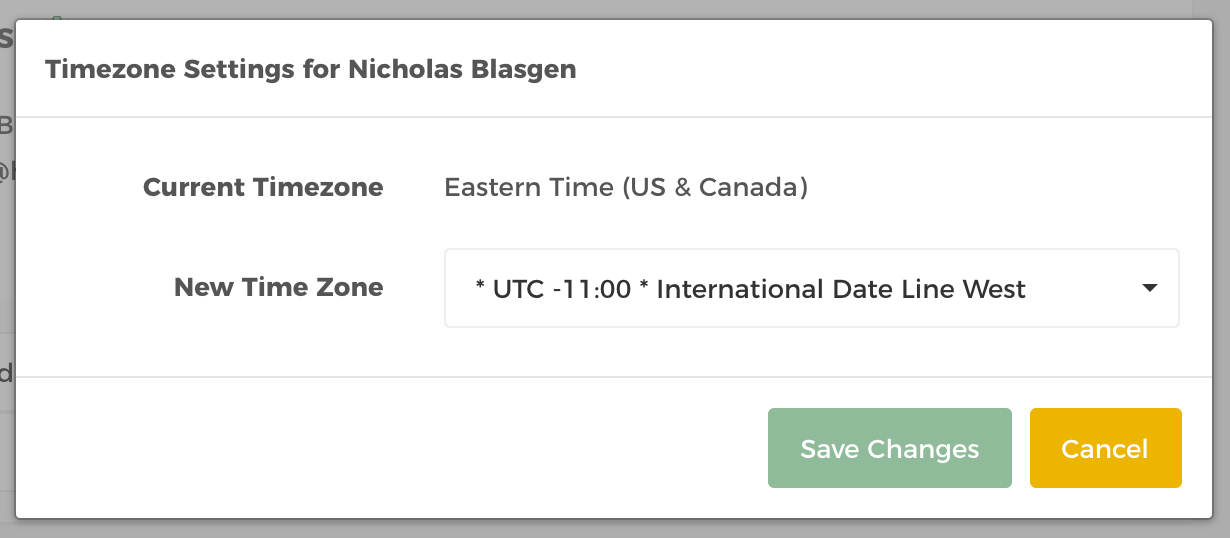
Edit Timezone
Click the pencil icon beside your timezone under the General Properties panel. Choose a new timezone from the dropdown. Save changes.
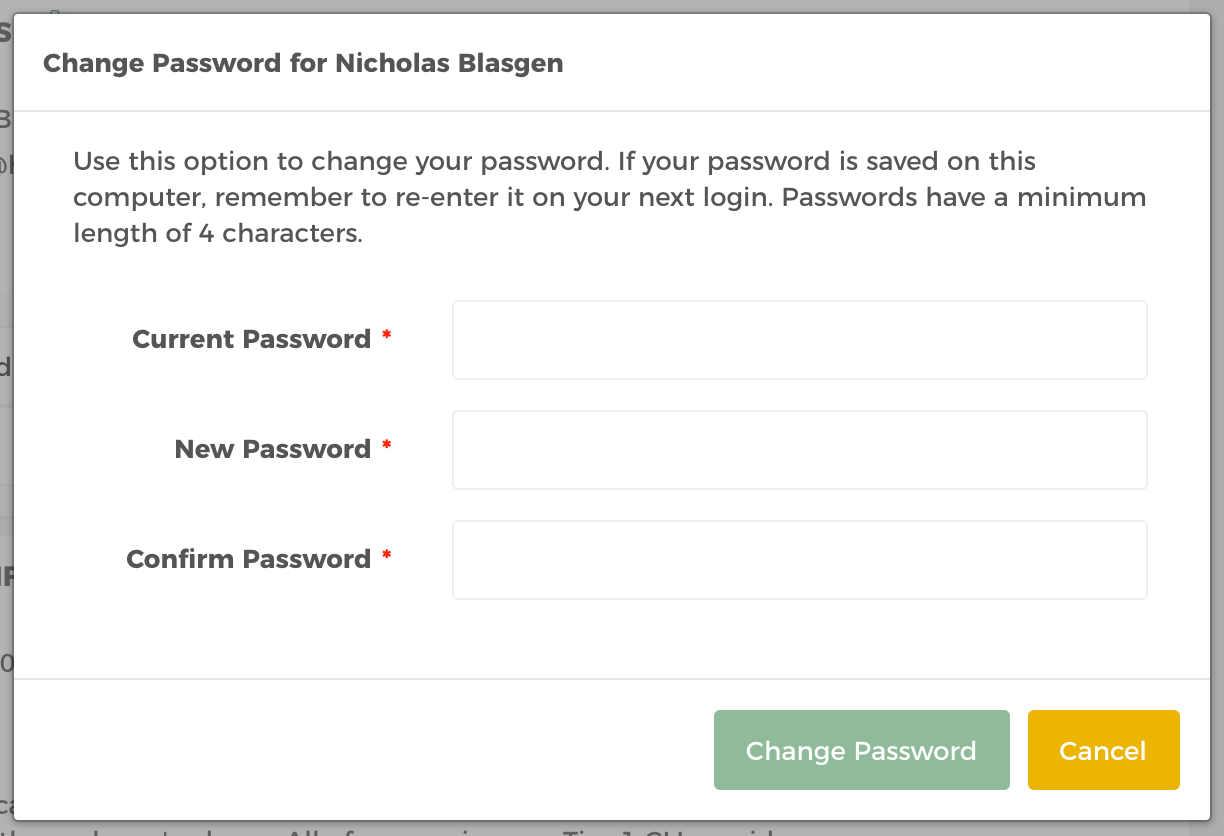
Change your Password
Click Change Password button. Provide current password to be able to create a new password.
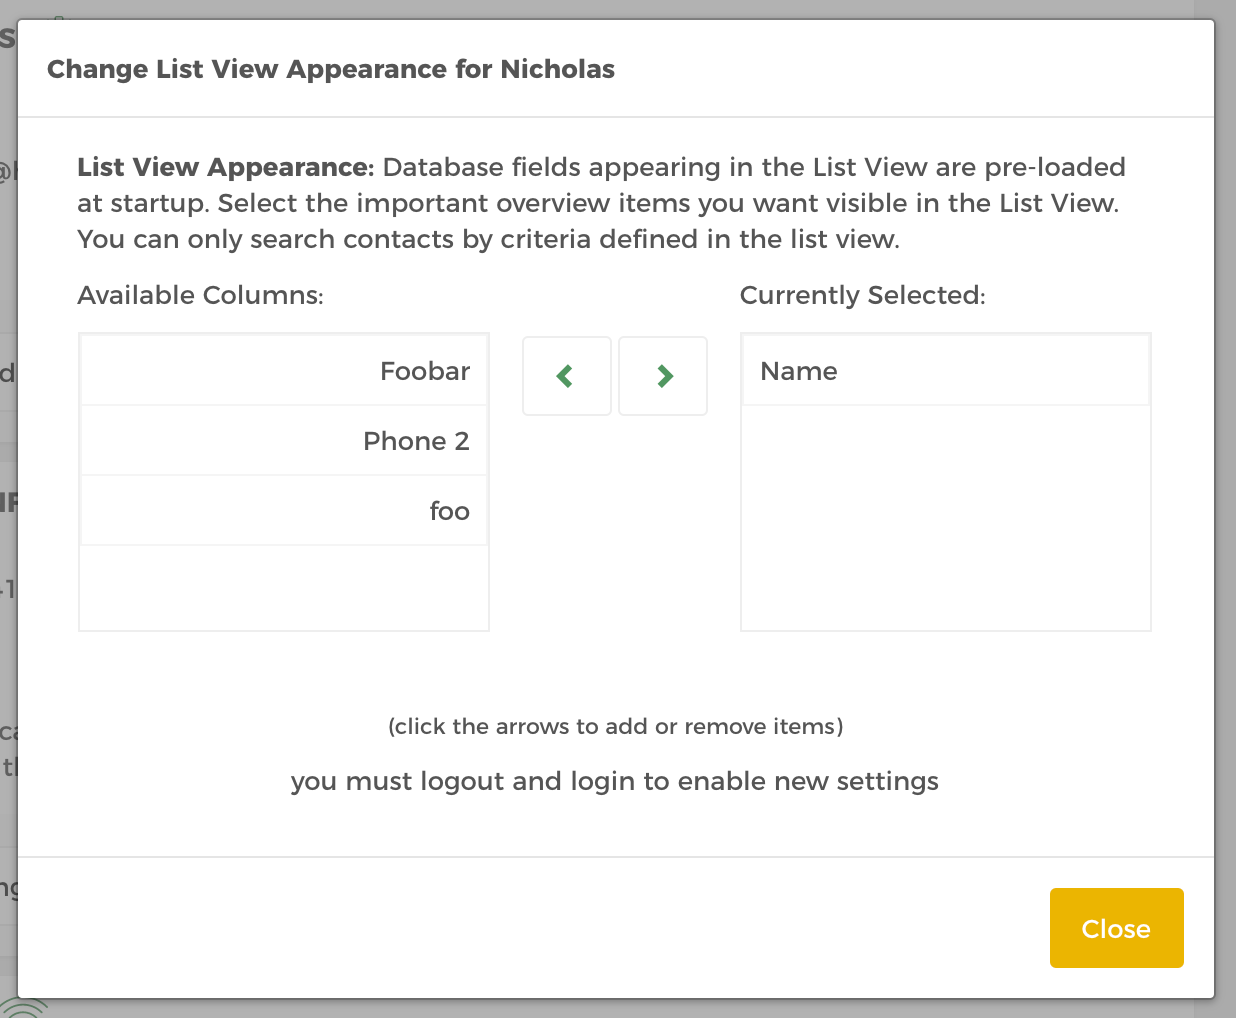
Change List View Appearance
Configuring the list view allows you to specify which database fields are shown when viewing the contacts via the List view. Adding database fields to the List view allows users to search based on the content of these fields. If a field is not added in the Change List View Appearance window you cannot use it as a search criteria.
Under the General Propoerties panel, click Change List View Appearance button. Select the column then click the right arrow to add to the currently selected list. Click the left icon to remove.
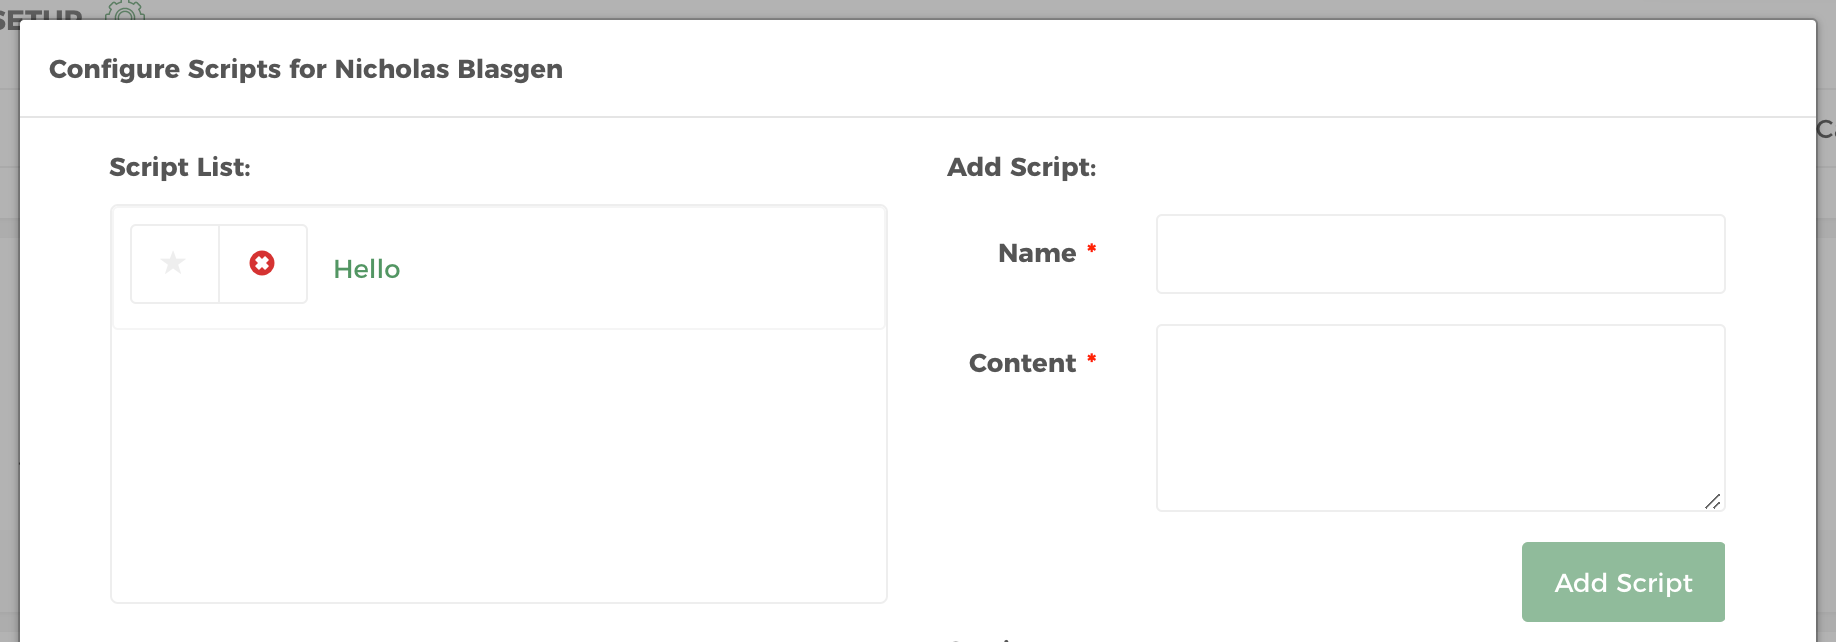
Setup Scripts
Begin by clicking the Setup Scripts button that says Edit Script Setup when hovered.
The dialer has support for agent calling scripts. The default script can be configured to appear on screen when a contact is found or when the agent manually presses the Script icon under the disposition bar. Press the Star icon in the Script list to the left to set it as default.
Merging scripts with information about the contact is possible by using the #{<Database Field Name>} within the content of the script. For example, if the script should start out as ‘Hello Matt, this is John Smith from HelloHunter...’ and the database field name to replace is Name (case sensitive) ‘Hello #{Name}, this is John Smith from HelloHunter...’ should be placed in the content.
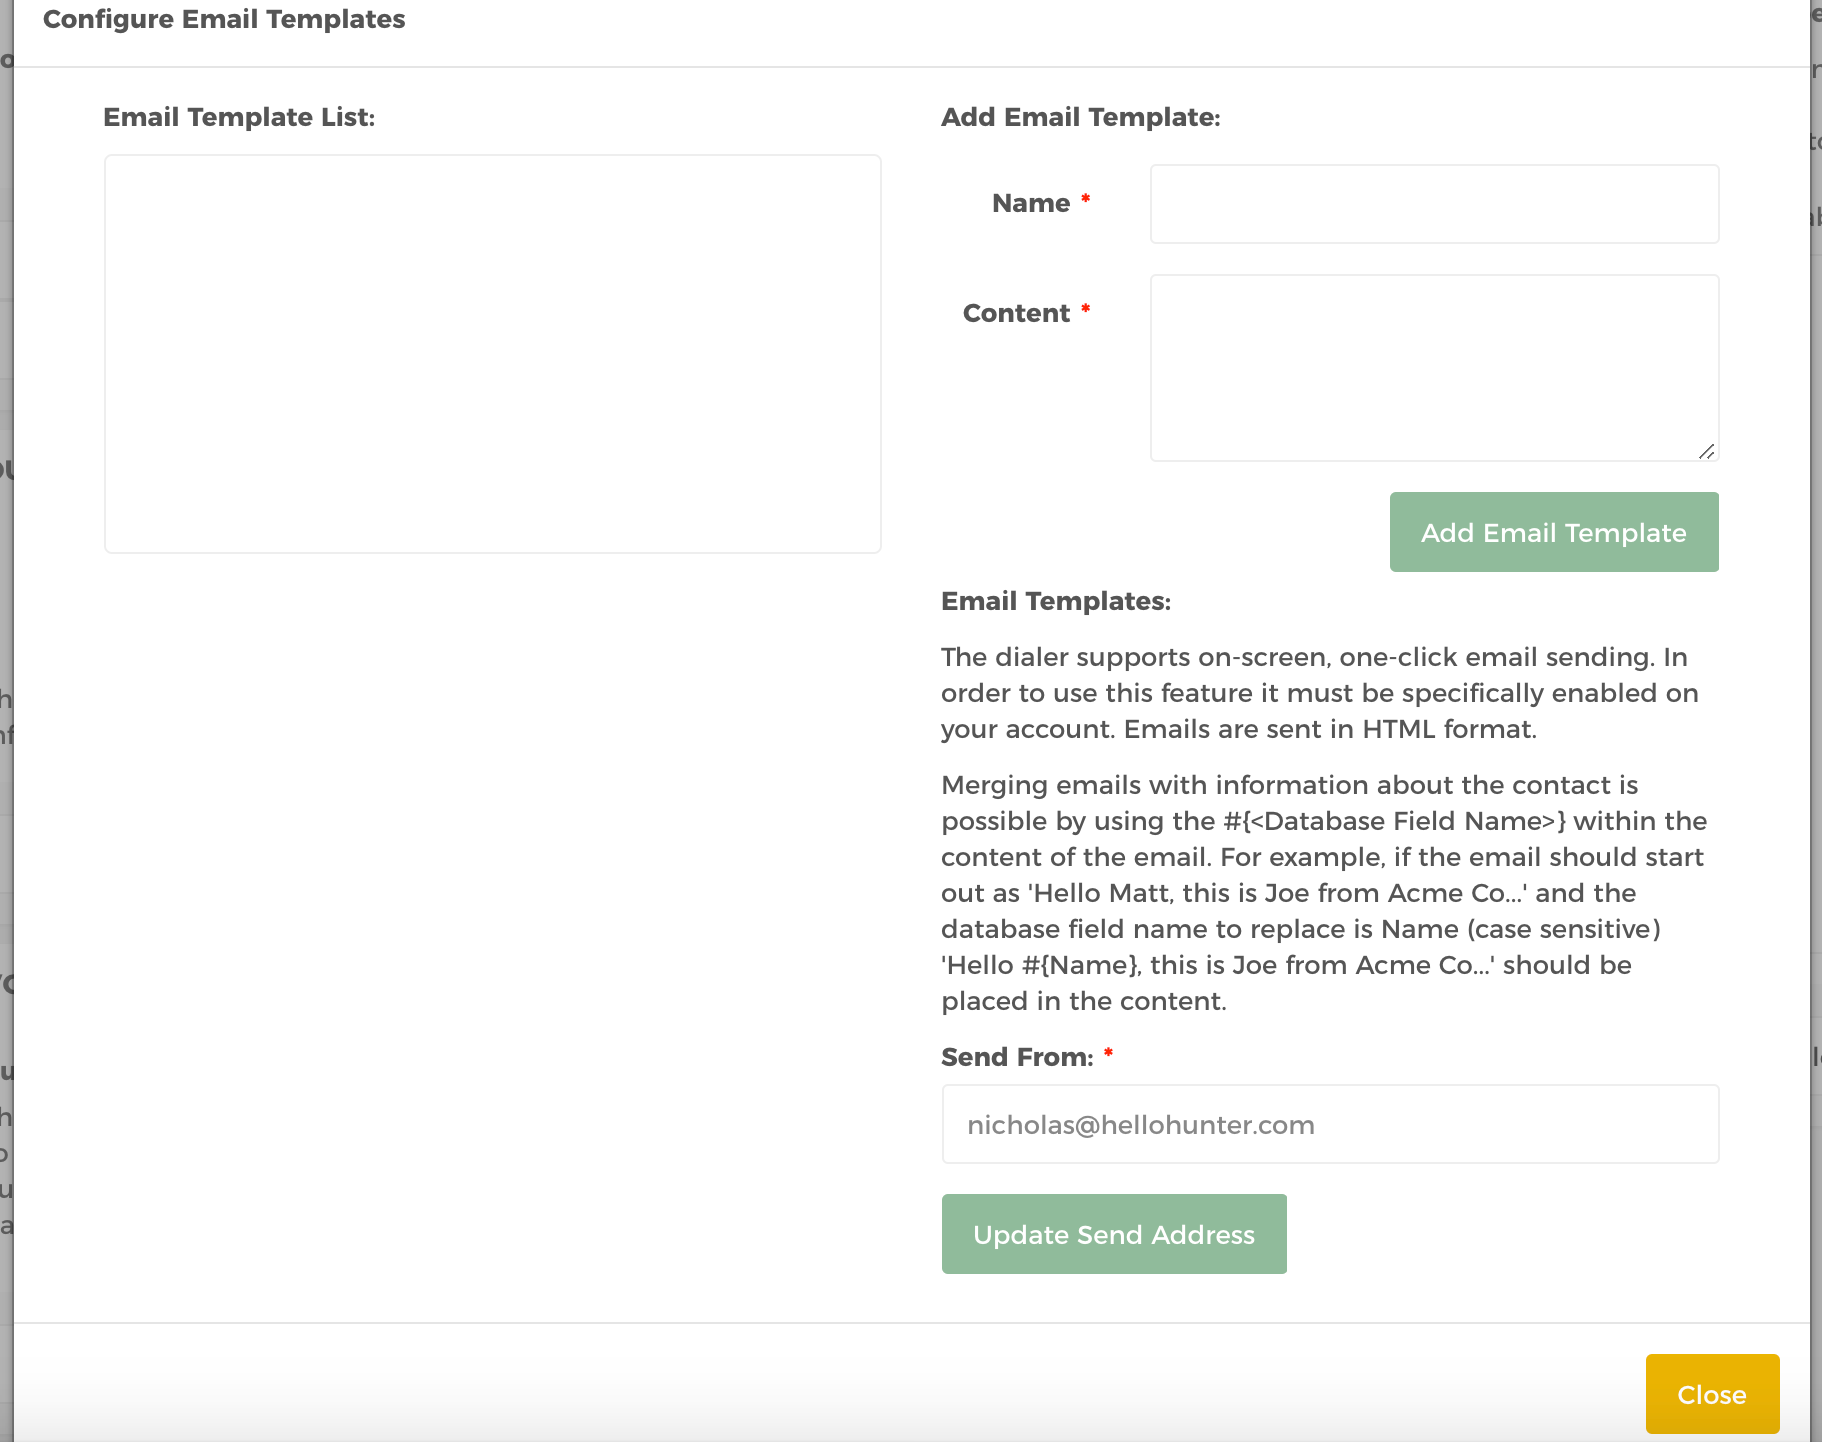
Setup Email Template
The dialer supports on-screen, one-click email sending. In order to use this feature it must be specifically enabled on your account. Emails are sent in HTML format.
Merging emails with information about the contact is possible by using the #{<Database Field Name>} within the content of the email. For example, if the email should start out as ‘Hello Matt, this is John Smith from HelloHunter...’ and the database field name to replace is Name (case sensitive) ‘Hello #{Name}, this is John Smith from HelloHunter...’ should be placed in the content.
Begin by clicking the Setup Email Template. You may also edit the sender email.
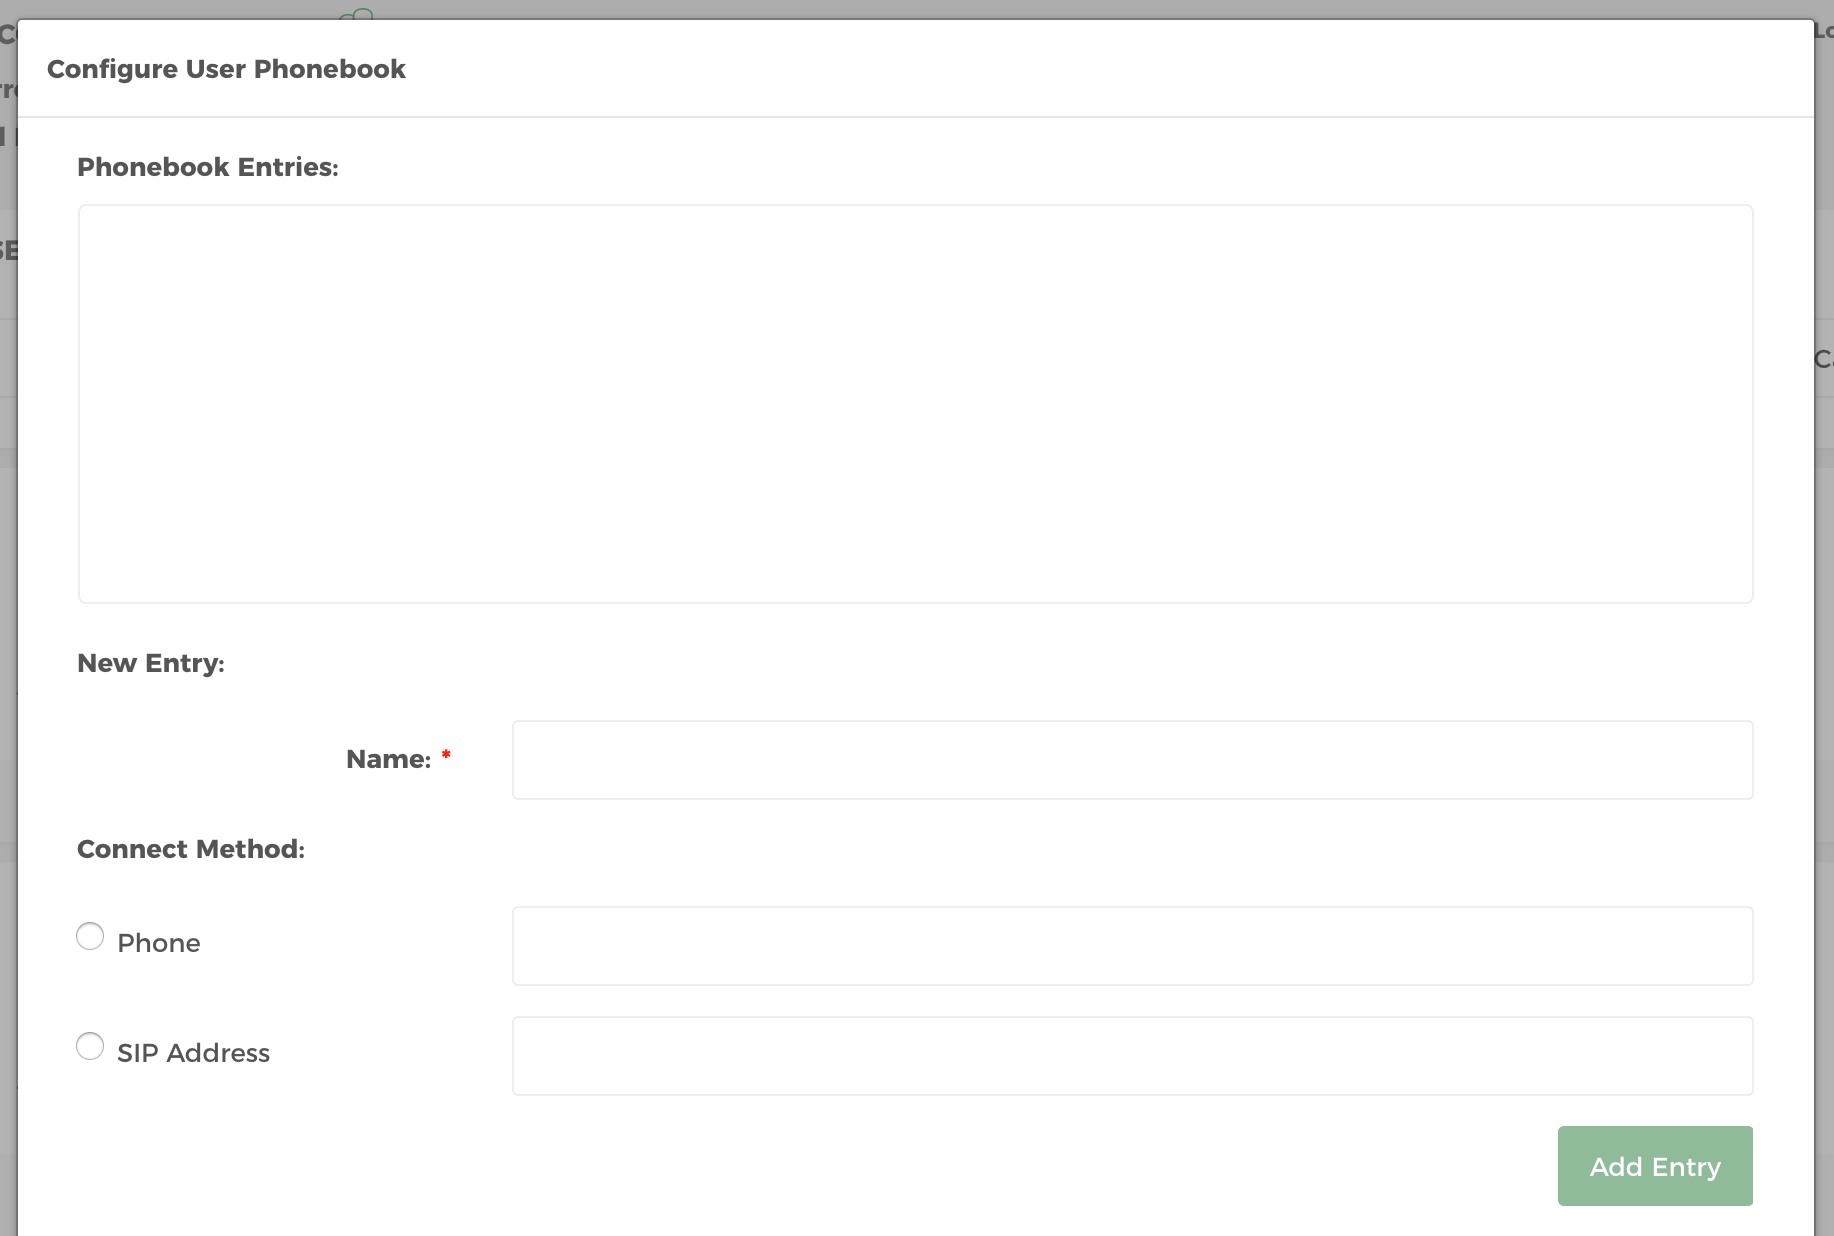
Configure Phonebook
Adding an entry into the phonebook allows agents to quickly transfer or 3-way conference commonly used numbers using a single click during a call. Phonebook entries can be added for either a standard telephone number (PSTN) or to a VoIP Address (SIP Address) using the add entry button. SIP Addresses should be entered into the format <extn>@<server>:<port> (ex. 106@ast.myco.com:5060). Phonebooks are unique PER user. Clicking the EYE icon will toggle the entries visibility in the Contact View menu.
Click the Configure Phonebook button then provide a name and connection method.
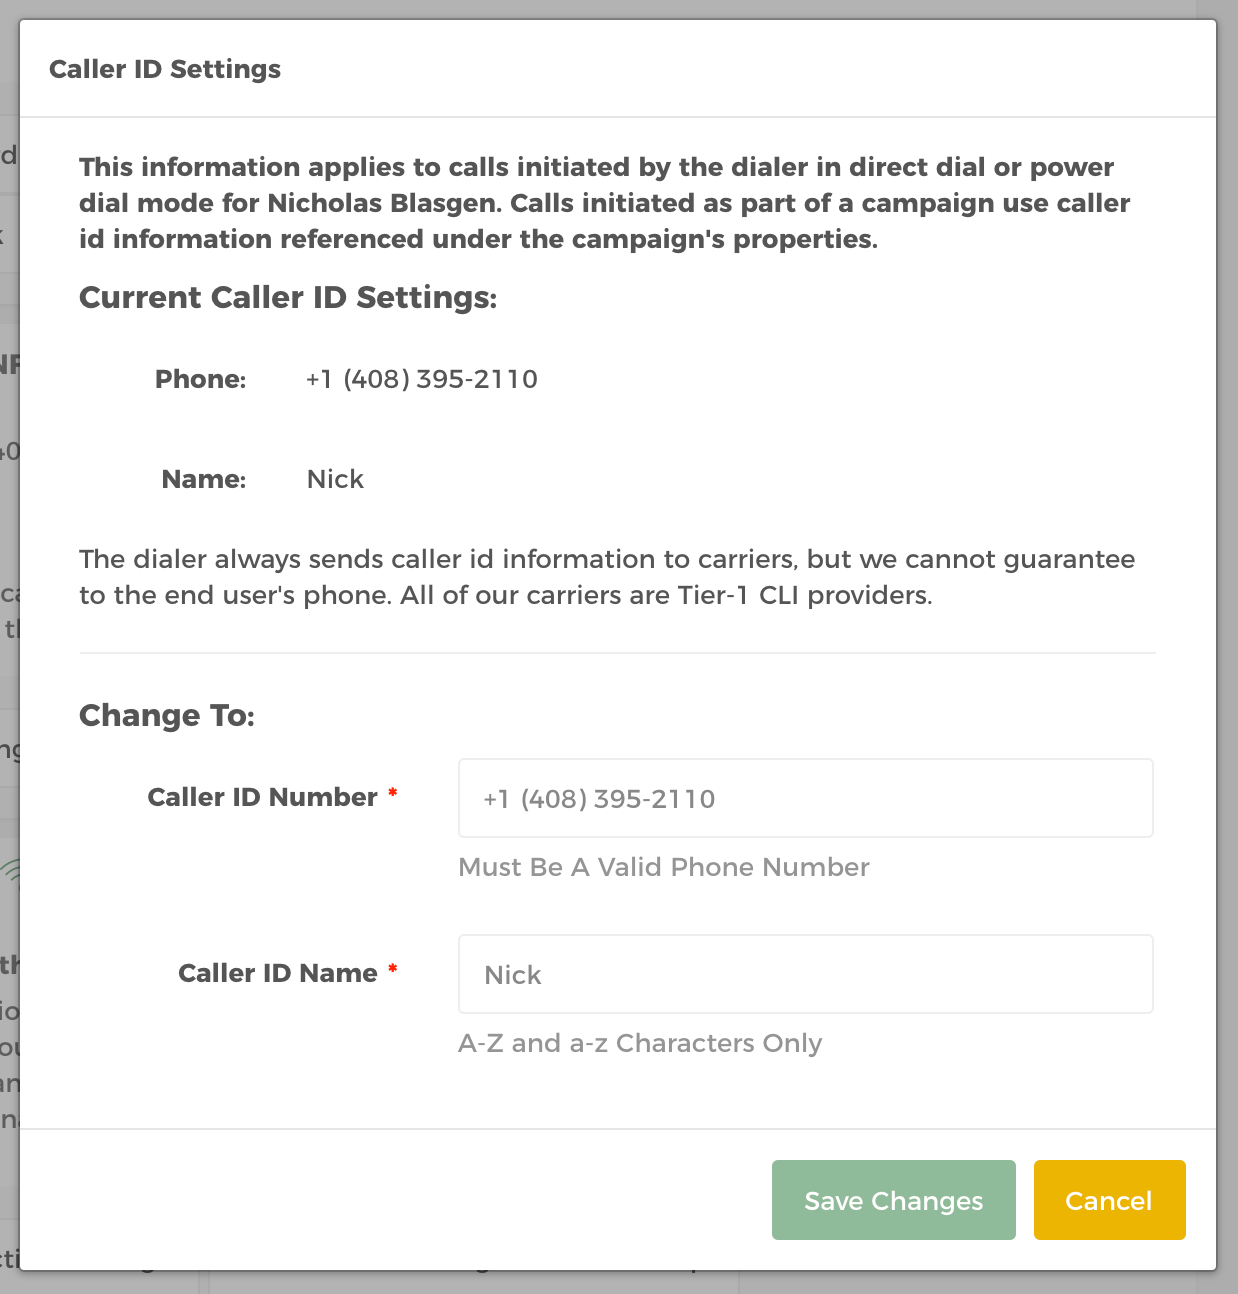
Modify Caller ID Settings
Change your Caller ID Settings by Modify Caller ID Settings button under the Outbound Call Configuration panel.
This is the CID information that will be used on the outbound calls generated by the system. This is what the client will see on their end. It is important to use real phone numbers. Using an invalid CID is not permitted by our service. Do not use 800 numbers.
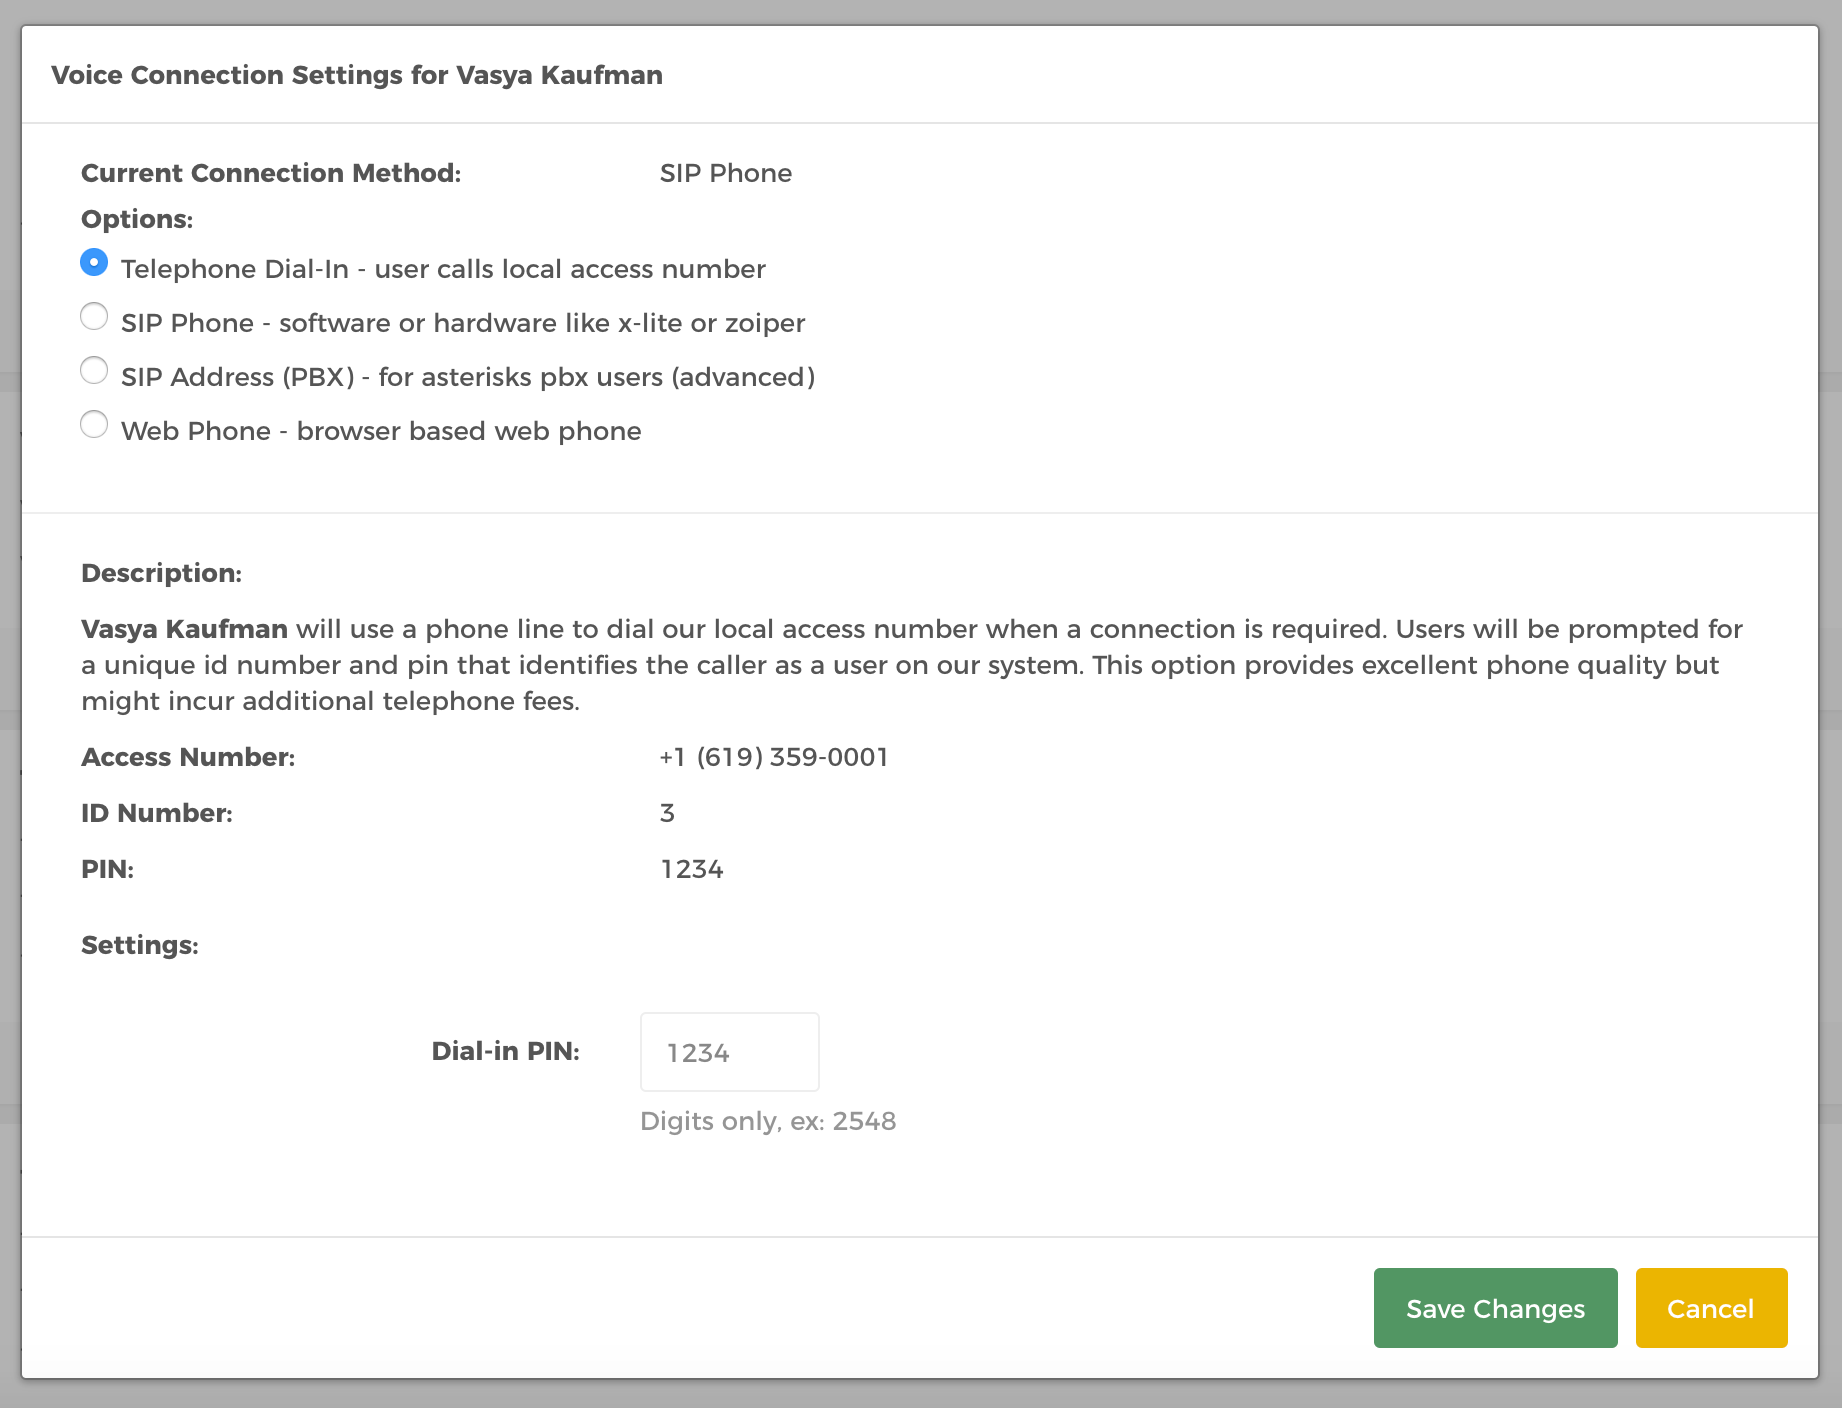
Change Voice Connection Settings
To change connection method for each user, click the Change Voice Connection Settings button under Voice Connection panel. We support 4 connection methods Telephone Dial in, SIP phone, SIP PBX and Web Phone.
Telephone Dial-In: User calls local access number.
SIP Phone: Software or hardware like x-lite or zoiper.
SIP Address (PBX): For asterisks pbx users (advanced).
Web Phone: Browser based web phone.
Add Sound File
This is the message played if there is no agent available to answer the call. Add a Sound File by clicking the Add a Sound File button.
Enter the required Name, Description.
Select method:
Uploading .WAV file: Click Select WAV File button.Record Over the Phone: Choose the number you wish the dialer to call you. When dialed and prompted, record your message over the phone.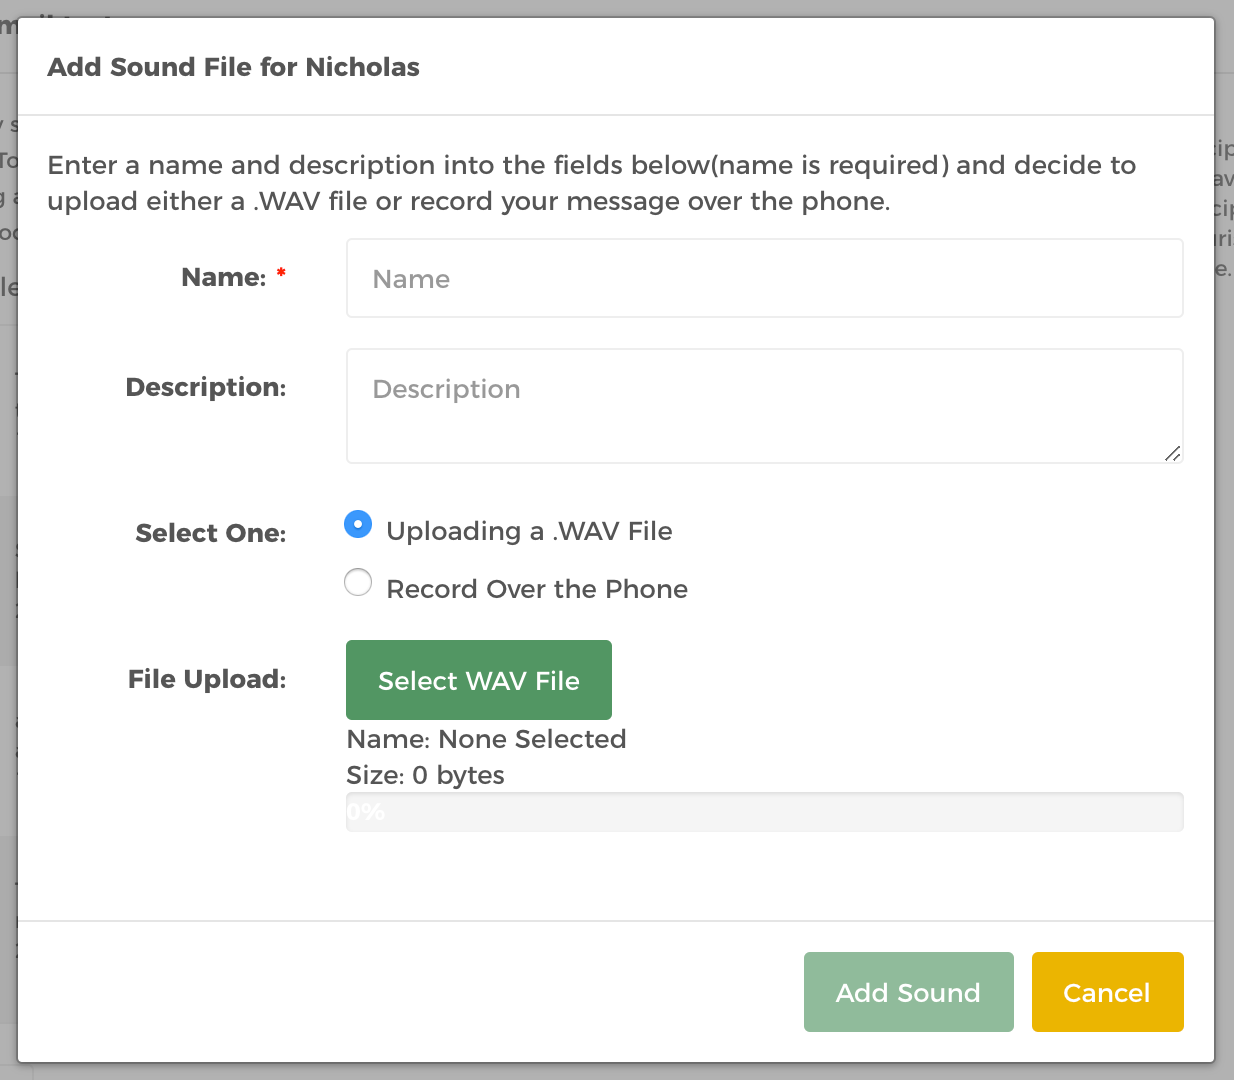
Lastly, click Add Sound button to save the sound file.